Long time no see!
Among the many projects I have been working on, and yes I do still live... are some Krieg.
I was inspired to do some Krieg by my friend Ed Miller who was playing a heavy Guard army with Smash Captain Blood Angels and that for some reason tickled my fancy... and my friend John Stiening who has one of the prettiest Krieg armies I have seen So in a drunken moment of poor decision making I bought several units from the Forgeworld store.
I've been slowly developing my paint scheme. I have a Shadowsword I want to paint but first I must master how. For the infantry I'm going the way of the classic French blue. That is a post for another time. For the armor I am going with the Forgeworld Masterclass approach from one of their books. Simple... Shades of grey.
I started with airbrushing my test tank with 3 shades of Valejo paint. Sombre Grey, Cold Grey and Stonewall grey. (Shadow, Codex and... damn I forget the other grey... you know it.) They just use the two lighter greys in the tutorial but I wanted a more blue base to go with my infantry. Then I wanted to do a heavily weathered and rusted finish.
I will do a separate post for the airbrushing part.
Here we go with the weathering!
I chose to use the Rust Stain and Streaking set from Vallejo.
Why? Well I wanted to keep with the Non Toxic acryllic based stuff. I hope it is!
Also this was given to me at some point and I figured I would finally give it a shot.
First lets talk about my test model. I applied some decals and gave it a coat of Army Painter Anti Shine. My Matte of Choice.
First, yes it is WAY over done. This is a learning model and the only way to learn is to practice! This poor tank has been painted so many times... I think it is one of my oldest remaining. It is actually holding up surprisingly well! For what its worth I think the paint chipping and rust dripping are fairly successful. I learned some decent applications that I will attempt to reproduce like the center panel of the rear of the turret for an example of dripping rust from a seam... the large dripping chip in the rear side panel... the chipped front part of the curvy thing on the side front panel... some of the flecks here and there... the top of the rear cabinet thing...
Here is a step by step on how I achieved the look. Pic Heavy!
First another shot of the weathered side.
Here is some first attempts at laying in some seam rust. I was
practicing with the application of the wash on a fresh side.
Here are some angles of the chips pre rust.
Here is the color I used for that rust.
Model Air Orange Rust. I will come back to this much later.
For the first bits of paint chips I use Ulthuan Grey. I think Stonewall grey as an
an extreme highlight, or Fenris would also work.
Of course, water it down. I use about a 50/50 mix of paint and water.
I scoop out a brush load of paint, then clean the brush and use the brush load of water to mix.
Then I use a detail brush to start edging the entire tank. The point of the brush will be pointing in towards the armor plate.
I build upon those first chips. Actually letting some of the paint gather and be slightly thicker can be effective here to accentuate the chip. The highlight is supposed to be the grey paint chipping up from the surface.
I work my way around the tank adding lines of grey here and there... like on the side hatch and across the skull decal.
I also put some scratches on the top of the plates. You can see that some of my scratches are more intense, like on top of the sponson... I'm hoping the less intense ones will look like less intense scratches.
Here is a good shot of that orange wash...
I continue to work my way around. This poor tank has been beat to hell and back. Once I feel that I have finally gotten plenty of chipped areas it is time for the next step.
Next up is Model Color German Black Brown
Mix with 50/50 water. Again I scoop out a brush load, clean the brush, then use the brush load of water to thin it down.
Then I start repeating the process over the chipped areas. Here is where you use Variety of Line to create emphasis. (Art teacher talk)
Look at the top of the sponson... I wanted a fairly good chip there so I made a good sized brown chip up against that large white mark... leaving a good amount of the white showing as well. To the right of that spot I make a smaller brown chip next to the smaller white... and just below it a brown chip with almost no white next to it at all. You can also see me work the edges. On some of the chips there are large amounts of white, on others the brown goes right through the highlight, poking its way to the gray undersurface.
Working my way down the side edges. Take note of the side hatch and rear side panel chip.
Here I have added the chip to the side hatch and rear chip, leaving a larger brown chip with the light highlight on the rear panel..
Up next is Model Color Chocolate Brown!
Same routine. Mix 50/50 water.
This one is pretty easy. Just drop this over the German Brown chips you just painted. It will look like fresher areas of rust.
The Chocolate Brown is a very subtle highlight and can probably be skipped. This is one of those things that the elite guys do that most people don't even notice.
Now it's time for some washes. First I used Callejo Model Wash for Light Colors as a pin wash, laying it into EVERY crevasse and seam. I also touched it onto every rivet.
Here you can see the was settle into the seam, and around the wheel gears and dripping down from the rivets.
Then it is time for Panzer Aces Llight Rust
This one I layer into the recessed areas using it pure from the bottle on a fairly wet brush, then let the brush feather out as I drag it down from the detail.
Here you can see the effect work well.
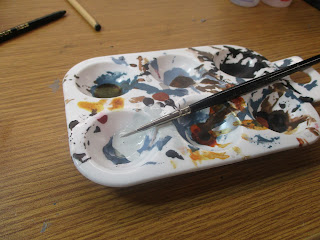
Then I use a wet flat brush with no paint on it to repeat the motion. Feathering out the pure color. As I use the flat brush I put the wood end of the detail brush in my mouth for quick access.
So back and forth. Detail brush with pure paint in the recesses of the joints, feather it out with the detail brush, then use the flat brush to spread it out more. Look to some of the other gears for the finished effect on this image.
Here I actually let the flat brush wrap around the gear.
Ok that is it for now! I will try to finish it tomorrow with streaking and grime. Stay tuned for more Krieg progress and lots of images of those Eldar I promised months ago!
Jawaballs


.jpg)