Battle Report: Blood Angels vs Ultramarines

Last night Brother Captain James and I got in a game at the club. He is always fun to play, mostly because when we play we bicker like school kids! This game would be no exception, but in the end it is all good clean fun. He did bring up a couple of great points that need to be discussed. I will get to those later.

Here is the Video:


Mission:
5 Loot Counters

Deployment:
Table Quarters


James played a jacked out 1750 Ultramaines list using Chaplain Cassius, Kantor, 5 assault terminators 3 with SS and TH, 2 with LC, a LR Redeemer, a drop pod Ironclad, a couple of TL Las Razorbacks, tactical squads with Plasma Canons, and a Sternguard Vet squad in a Drop Pod.

I won the roll, and gave James first turn. I immediately regretted the decision though, The loot was set up with 4 of them all no more then a foot or so between them in a rough diamond shape. With him being able assault the crap out of any one of the objectives with extreme force, I would be hard pressed to take any of them. So, I decided to reserve every thing, and see if I could isolate any of his forces on reserve rolls. There was no way I would win a stand up fight against his army.

Turn 1:
James brought his Drop Pod IC down in the middle of the table, then ran it into cover. He had a mental fart here and popped all of his smoke launchers. I had nothing to shoot at him. The rest of his forces moved to secure objectives, and prep for my arrival. It seemed I would be charging into the maw of the beast...

Turn 2:
His second pod came down, and he placed it next to the one objective that I placed on the far side of the board. I usually always place all of the objectives in a cluster, then one on the opposite side of the board so I can take advantage of my speed. Having one defended by 10 SG Vets would make that a little tougher... He positioned the rest of his forces in cover and waited. I dropped the Speeder and attack bike from my list, so I have no mobile Melta Guns, except for one I added to my Tactical squad, along with a Rhino. I also put an extra Storm Bolter on that rhino, making it a mini gun platform. That choice drew some snickers, but hell, why not??

On my turn, Dante, Corbs/DC, a BP and my Furioso came on. I was unable to charge his IC because his LR was close enough to counter attack. That would be a problem. So I deployed all but my BP in the near left corner. I made my choice, that was my path of attack. My plan was to suck all of his forces towards that corner, leaving the middle open where I could then bring in my Rhinos and speed in to take/contest objectives while our assault elements slaughtered each other. My boys moved in and merely stunned a Razorback. Dante assaulted it, immobilizing it. Sigh... It would be a long game. My BP moved up on his veterans whom James combat squadded, and killed 2.

Turn 3:
Still unwilling to commit his Land raider and terminators, James jockeyed for more positioning. It is a subtle dance to deny your opponent the charge. He had to keep his LR away from my dreadnaught. He did some shooting with his lascannons and plasma, and exploded my DC Rhino. Cracked from their shell, they would not survive long.

On my turn, I moved Dante 12" where he cuold take a shot at the Ironclad. I was hoping to get lucky. With that thing destroyed by Dante's meltagun, my Rhinos would be free to run. Instead it was keeping me at bay since it was in assault range of the entire middle of the table. It would kill any thing it went after... it had to die. So, Dante fired but James made his cover save. Drat. This was a pretty huge tactical mistake. I knew that Dante was going to go down soon. He was in assault range of a whole squad of terminators led by Cassius and Kantor. I was going to get in one good turn with him. Wasting him on a shot at a dread that he could not hurt in the assault was a poor choice. I killed a couple more vets with my BP, and assaulted the immobilized Razorback, exploding it. Crap. I just cleared the way for his LR to assault me. I brought in my first troop rhino, and zoomed it up 18" along the left flank. This would be my first wave in the pincer movement.

Turn 4:
Now it got bloody. James finally committed his Land Raider and Terminators. He moved it up, shooting its guns to no effect, then disgorging the squad. Kantor broke off to assault my flanking rhino, while Cassius took the terminators in against my furioso and the DC. Curbolo left the DC and ran for cover last turn. All of the DC would die in the shooting and first wave of the assault, as well as the Furioso, but at least it managed to crunch two of the 5 terminators, and Chaplain cassius took a wound. Tough to manage with his T of 6. :) Kantor knocked out my flanker, forcing my assault squad to deploy. His veterans tried to get out of LoS vs my BP. The sad loss on this turn was his IC Dread charging Dante, and popping him. The only good to be had from this was that I lured the damn thing out into the open where I could get a shot at it with my Tatical squads meltagun.

So on my turn, things were getting dire. Dante was dead, along with my furioso and the DC. James held or was contesting all of the objectives and I was going to be forced into assault with two of my 4 mobile troops squads. My other two Baal Preds fired shots at the land raider and other Razorback. I failed to hurt the LR, but Exploded the Razorback! Not only did I destroy the stupid tank, forcing the squad out into the open and killing a couple, but the shrapnel also injured and KILLED Cassius. What a turn of luck for me. My tactical meltagun disembarked their Rhino, which stalled out... and moved up and melted a hole in the Ironclad... destroying it. My Baal Predtor taking on the veterans knocked out a couple more. In the assault, Corbulo took on the remaining marines from the razorback, while my other tactical combat squad and the stranded assault squad charged the terminators. The fight for this objective was on. I managed to kill another terminator and lost only 2 marines in the assault. Corbs killed a marine and took a wound himself. The fighting was close and gory. I was able to bring in my last troop rhinos, and as I hoped, was able to charge them up the middle, rolling to plow them through terrain and get them into position to take objectives.

Turn 5:
The game was rendering down to a battle for objectives. James moved his surviving veterans into claim the far objective. There were still two squads, one with 2 and one with 3. He moved the Land Raider back into a defensive position in the middle of the objective diamond. In the assault, he would lose his terminators, but charged Kantor into the mess. He would also wound Corbs again,killing him, and charge another combat squad at my meltagun tactical... those guys would trade blows the rest of the game.

On my turn, my Baal Predators would start to control the battle field. They mowed down one of James' combat squads holding an objective, taking it away from him. All of my remaining rhinos would either stall or fail to roll for fast vehicle. Drat. I managed to move one up and park it on an objective. The trailing rhino decided to take a right and go assault the veterans holding the objective. I successfully tank shocked them, and contested the objective. I also tank shocked the one that was so furiously being fought for in my corner. That one would be contested as well. At the end of turn 5 the game was actually tied. Two objectives were contested, we each held one, and one was untouched. James rolled the die, and the result would force turn 6.

Turn 6:
On his turn, there was not much shooting to be had. He attempted to pop my rhino holding the objective but missed, and charged my one contesting his vets, but failed to hurt it. In the assault, Kantor would finally finish off my assault squad and forced my tactical squad to fall back. They made it just to the edge of the table with some lucky rolling and chance. Phew!

On my turn, I went for the win! After failing to tank shock his held objective, my Baal Preds managed to kill off just enough to take away the marines holding it... denying him that last one. The falling back marines regrouped and killed his marine on my objective. But I was unable to take it. My rhino contesting the veterans stalled, so I was unable to pull any shenanigans over there, leaving that one in a draw too. But at the end of the turn, I held one objective, James held none. The die roll would end the game, giving me a narrow victory!

Star of the game? My Baal Predtaors. They laid down the law, taking out two combat squads that were holding objectives to give me the win.

This was an overall fun and great game, and most importantly, this was a text book perfect example of what makes the Blood Angels a top tier army rather then a bottom feeder. Cough cough... Jwolf... :)

I will add that this game brought up a couple of questions:

1. If an objective is on the second level of a building, can troops contest it by being below it? If a model is not on the same level as the objective, but his head is within 3", is he close enough? Also it was brought up that objectives extend an infinite extension of themselves up and down. SO, by that rational, a model could be 5 levels below one and still contest it, or contest it from orbit... Any thoughts on that? After debating it with James, he does make a valid point. So I begrudgingly digressed. Squads with models on different levels are considered in coherency because their heads are within range of the other bases. Why not apply that to the objective? Thoughts?

2. If a Baal Pred held in Reserves rolls a 1 on its OCE roll and stalls, what do I do? Does the tank fail to come on at all? Do I place it on the table but stalled out? Does that mean it counted as stationary when it entered play and can fire all its guns?

More to come. JB.

How to Win Warhammer 40k: Blood Angels Tactics 3, General Plan

Welcome back! I believe I should have probably started with this post, and then discussed how each of my units fits into it. Never too late though! My first two posts were about Dante and Corbulo and were very specific. This one will be a about how I play my Blood Angels in general. Keep in mind, that I do not win every game. But I am a contender at every tournament I go to and know that I have a good chance at victory, or at least not losing, in every game I play. I suppose that is all one can ask for!

I have touched on some of this stuff in other posts, so some of the info I am laying down here may be repetition. I just wanted to get it all in one spot. Jwolf, over at Bell of Lost Souls recently wrote an article placing Blood Angels in the bottom tier of 40k armies, based on his experience. He quotes "Small pockets of destruction" and the fact that in order for BA to be strong, they have to concentrate themselves in one small portion of the table, leaving themselves vulnerable to blast templates and eliminating their overall effectiveness. I want to begin by saying yes, he is correct, IF I try to play Blood Angels like a normal space marine army. The simple truth is that BA cannot stand toe to toe with a generic codex space marine army. With the exception of the Baal Predator, Generic Marines (GM) can field units that at least match and in most cases better BA ones. Honor Guard, Veteran squads, Terminators, Ironclad Dreads... the list goes on. To take it one step further, they can do it cheaper in most cases.

When most people look at the BA codex, they drool over the prospect of scores of Assault Pack infantry leaping over terrain bristling with power fists and raining death upon their opponent basking in the glow of Dante and Corbulo. I believe this army might be the one that Jwolf is in part referring to. I tried this army and it simply does not work. Any smart player is simply going to sit back and fire away. You cannot hide those assault squads in 5th edition, and they will either be nipped down by withering small arms fire, or destroyed completely by blast weapons. True line of sight makes this army a loser. Sure, you will destroy some guys if the circumstances are right... but to put it simply, forget it. Move on. There are a couple of other armies that people try but will fail. The Land Raider full of Death Company for example is a one trick pony. Hell, the BA Land Raider is a poor choice any time since it does not have the same Machine Spirit or capacity as a GM one. Guys feel the need to load up on Terminators... Boycott them outright until they get 3+ Storm Shields or are made cheaper. Resist the temptation to overload on Elite choices. Point sink units will wear you down. The most expensive unit in my army is my Tactical squad. With it's Rhino, it costs about 250 points. Every thing else is 150 and under. (except Dante) The secret here is maximizing your army size, while minimizing the cost.

Now, welcome to The Way of Sanguinius!

It is time to go over the secret, the key, the way. If you are looking for an army that is going to bludgeon your opponent into submission in 4 turns, Blood Angels fail. But the good news is 5th edition is NOT about bludgeoning your opponent like 4th edition was. With Victory Points removed from you game, and 66.6% of the missions being Objective based, you can win without even killing a single enemy squad! Blood Angels can do this better then any one. Allow me to explain.

My army is a mix of overwhelming assault force, devastating "Torrent of Fire", and speedy troops. Dante, Corbs with the DC in their Rhino, and the Furioso are the spear head assault element. My 3 Baal Predators and Tactical squad provide fire support, and my 3 Rhinos with Assault Squads inside run the endaround and take and hold objectives. It is the rule of 3s! One Baal Pred is good, but 3 Baal Preds are devastating.

I send the assault element right at the heart of the enemy. But I do not charge blindly. Setting up your opponent so YOU get the charge is an art. If they get the charge, there are very few squads in the game that can survive an attack from Dante and a Death Company Furioso supported by Corbs. If they do, you can unload the Death Company next turn and finish them off.

I keep the Rhinos back and ready to go. I protect them from long range shots, and spend the first two rounds getting them in line to make their attack runs. Of course, a Rhino is fragile, and 5 guys inside will die if your opponent decides they want to kill them and has the time. So you hold them back and safe until turn 4, then send them out! Over-Charged Engines (OCE) will allow you to get to where you have to go.

Lastly, 3 Ball Preds (BP) and the 10 man Tactical squad provide all the shots I need. I recently just added a Rhino and Meltagun to the tactical squad (TS). That gives me one more option for taking objectives. 3 BP is a truely scary thing to behold. Think about it. 3 tanks with AV 13 advancing and shooting 12 shots each. 10 of those 12 shots will deny armor saves to any thing not in power armor, and wound on 2 or 3 to almost every model in the game. With so many cover saves and invul saves in 5th edition, the game is about Torrent of Fire (ToF) which is simply LOTS of shots. BPs provide that. Using OCE they can advance 6" and fire all of their guns, or advance 12" and fire their Assault Cannon and Storm bolter. You can charge the 3 BPs up 12" and unload 24 shots on a squad. That is a 36" range to deliver a volley that can kill most squads. Giving them extra armor and using them to overlap cover saves makes them that much harder to kill. AND if they are rendered useless from weapon destroyed, but still are mobile, they can ram from 18" away getting a STR 10 shot.

To refer back to the post by Jwolf, yes I do tend to keep my army clustered. But any marine player does. Marines are expensive, and spreading expensive units leads to isolated units, leading to dead units. But this is not a weakness. Clustering my forces means lots of cover saves in the pivotal first two turns. Then after that comes the break out and land grab. OCE allow Blood Angels to do it well.

Allow me to address each of the 3 standard missions.

Loot Counters:
This is my favorite mission. Remember, again, this mission is NOT about killing your opponent. The winner of this game is simply the guy who has more loot counters at the end. When deploying the Loot, I set up the one I intend to keep, and the two I intend to take. I ignore the rest. I plop my Tactical squad on the one I want and surround it with my assault element. They then head towards the ones I want to take, and are followed by my Rhinos. The BPs advance softening up their defenses for my Assault Element (AE). The Rhinos get into position to move up and claim objectives for me, and/or contest his. Zoom the rhino right up onto the objective, hopefully it will have cover, and sit there. The enemy has to first pop the rhino, then kill the marines inside. If you wait until turn 4 to do this, they will not get them all. If you need to, unload the AS inside. After all, they are assault marines, with assault weapons, and a power weapon veteran. Even without Dante and Corbs in range, they are a tough nut to crack. All you realy need to do is hold one objective, then contest all the others. Victory Blood Angels. I will write a lot more about these tactics later in more specific posts.

Bases:
Each of us have one objective and must try to take it from the other. If a Blood Angels army ever loses this mission, the guy needs to give up and play something else, he is an embarrassment to the blood. This is the same as before, but even easier. Set up your tactical squad on the objective surrounded by the AE and BPs. Reserve your rhinos. To get to your base, your opponent has to go right through your advancing stuff which is just what you want. Simply hold yours, try to take his, defend, and send your rhinos for the End-around again. Get em in to contest... victory Blood Angels.

Kill Points:
This one is a little more tricky. A mechanized Blood Angel army will have lots of Rhinos... which are fairly easy kill points. This mission is my armies greatest weakness. I find myself hiding them all the way in the back, using cover, smoke etc. Reserve them for sure. Then when they come on, you can deploy them turn 2 or 3 in safer spots on the board. In a kill point mission, you need not overwhelm your opponent. You only have to finish the game with one more kill point then he has. Sadly, almost all of your fire power is mid range. (Using my army list) Set your self up so that in order for your opponent to get a kill point off you, he has to expose himself to your shots. And if you cannot get a kill point without exposing your self, DONT GO FOR IT. Make him make the mistake. Be patient, sit back, fire your Las at his transports. Try to get second turn. That is a huge edge, because on turn 5 and 6 you can advance and grab kill points without threat of reprisal. Make no mistake, KP missions are hard to win for my army. But it is possible!

Other Tips:
I very often reserve everything. Most people do not know that when you reserve, you come onto the table on your TABLE EDGE not DEPLOYMENT ZONE. You can catch them, especially when playing a table quarters deployment. Reserve some heavy hitters. He may try to flank you and come close to your table edge in the corner you did not deploy on. When your reserves come on, you can get right behind him, or assault him from the edge... Sneaky...

Reserving is key for anti drop pod. When up against a heavy pod army I always reserve, and make him go first. If you are lucky, all of his pods will be down before any of your stuff is on the table. Then you come on and deal with his isolated pods. Sneaky...

Reserving every thing keeps your juicy Rhinos off the table. You dont even want them on the table during turn 1 and 2. Reserving allows you to get them into the fight on your terms, where you want them, and protects them from 2 turns of Heavy weapons fire. They are fast enough to get where you want them to go in 2 turns. Since they have troops inside, they simply need to be within range to score and you got em.

So there you go. How to WIN with Blood Angels. Play the mission. Contest objectives. Do not get into a slugfest. Use the Baal Predator liberally. Pick and choose your targets. Use all of your firepower to completely destroy a target before moving onto the next. Do not be afraid to shoot assault cannons at Land Raiders. They are actually better at killing them then Twin Linked Lascannons.

I am sure I will add more to this as the thread develops.

JB

How to Play Blood Angels: Where to begin


So, the question has been asked many times. "Jawaballs, I love your models, how do I start a Blood Angels army?" Rather then answer that great question every day, I have decided to start a post here and continue to update it. Feel free to add to this for those newcomers that I will be directing to this thread.

If you have found yourself here, you are either a regular reader, or I directed you to my blog from Youtube. Either way, thanks for stopping in! First of all, if you want to know where to start with a Blood Angels army. Watch the video attached to this post. To begin, go out and get yourself this list of items:

Brother Corbulo
Space Marine Battle Force
Assault on Black Reach
Box set of Death Company

That ought to cover you for models. The AoBR has the rule book.

Now, get yourself the Blood Angels codex, which is found under the Downloads tab on the GW website. Linking to it does not work for some reason. Search the site, or call GW to help you find it. It is a free download. Print it out. Many thanks to Master Darksol who showed me that the links to the GW website do infact work. By the way, if you have not checked out his blog, do so. The Emperor Commands. I had tried to link that codex before to no avail. Here is the Blood Angels Codex.


Also, get the following hobby items:

Xacto Blades
GW Super Glue
Pinning Drill

Paints:
Blood Red
Blazing Orange
Chaos Black
Boltgun Metal
Skull White
Bestial Brown
Bleached Bone
Golden Yellow
Baal Red Wash
Badab Black Wash
Mechrite Red

Reaper Kolinsky 10/0 brush
Citadel small and large drybrush

GW Black and White spray primer.
(or a substitute)

My set of "How to Paint space Marines" Blood Angels available HERE.

That should get you well under way.

Now, put together a 500 point army, and start painting. If you are a beginner at Blood Angels, my videos are a must have. Without tooting my own horn, they have helped hundreds of guys learn to paint, and will answer every question you have.

I suggest Mechanized Blood Angels. Read every word on my blog, check the archives, and learn my list and tactics.

Get Corbulo, a tactical squad, your death company, and an assault squad, and get them all in Rhinos. Corbs can ride with the DC. There you go! That is a quick start to your new world dominance. More to come.

How to Win Warhammer 40k: Blood Angels Tactics 2. Brother Corbulo


Welcome to segment 2 of How to win Warhammer 40k. I could not post a tutorial on using Dante without posting about my other HQ choice, Brother Corbulo. Also, I want the reader to bear in mind that these tactic posts are designed with the standard missions in mind from the Warhammer 40k Rulebook. Of course, at tournaments, tactics and mission objectives will change. Hopefully, you will be able to adapt what I present to you here and use it to win games. You might not be able to win against some of the uber cheat armies, and people might consider my army a little cheezy as well. But the one major distinction is that my army follows the fluff and history of the Blood Angels. Every thing in my army is encouraged for use by Blood Angels lists. A fine example of a contrasting list. The Two Warboss/Nob Biker list. Absolutely not would two equal Strength Ork Warbosses team up. It defies the nature of chaos, orks and the universe. It is a simple accepted truth that the two war bosses would first fight each other to see who is stronger, and then one would be the warboss, the other would be a big freaking nob, or dead. Yet we see more and more of these armies on the table. Plus, we see players very sneakily diversifying each nobs gear in the squad, for the sole purpose of exploiting the Wound Allocation rule. Great job ork boys.

So, my point is that my tactics are designed to help you win against most non uber cheezed armies, playing the standard 5th edition missions. Having said that, I welcome any and all arguements to my posts. With one rule. Keep it clean of rude language, and back up your statements with fact. It is amazing how hard people find those two simple rules. If you think I am wrong with something I have said, that is fine. Explain why, and support your statement with page numbers and rules quotations. If you cannot do that, please do not post.

OOOKKKKKKK! Time for the Bro.

If you are taking Dante, you have to Take Corbulo. Lets talk about his gear first.

Chain sword. What the hell? One of the highest ranking Apothecaries in the Imperium canot afford a power sword? I would gladly pay 25 more points for this model to have a PW.

Sanguinator. Standard apothecary gear. This allows him to negate one wound per turn within 6" of him. The wound cannot have been caused by any attack that denies armor saves or instant death. Unlike new codex apothecaries, he does NOT grant a squad he has joined Feel No Pain.

Corbulo can lead the Death Company. A DC squad not within 6" of Corbulo or a Chaplain must move as far as it can towards the nearest enemy model during the movement phase.

The Holy Grail...
This thing has TWO effects. First of all, it grants Corbs a 4+ Invul. But most importantly, and the reason why this is AWESOME, it grants all Blood Angels within 12" Furious Charge. This does apply to Dante, all troops and my Furioso Dreadnought! Yes, that is right, my dreadnought charges at initiative 5, and Dante charges at initiative 6 with Str 5. For this reason alone, Corbs is mandatory.

How to use him:

Attach him to the DC, and buy them a rhino. I do NOT use jump packs for my DC. Doing so necessitates taking Lesmartes, and he is not worth it. Nope, I load them up in a Rhino with Extra Armor, all painted black and covered with skulls. People fear it. The reason why you put him in a rhino is not only to let him keep up with Dante, but because his powers work from inside it! (Please correct me if I am wrong, with facts, quotes and page numbers.) I am not interested in opinion on this one. So, Corbs can lead the DC, negate wounds, and grant FC from in his rhino.

Move the rhino up, it is perfect for blocking Line of Sight for Dante too. Charge it up to Dante's target and park/pop smoke. Keep the DC inside. Jump Dante up into assault range. Send him him! Make sure he is within 6" of the hull of the Rhino. If Dante takes a wound, negate it. Next turn, if you have taken a bite too big to chew, unload the DC, and charge them in!

If you are forced to disembark Corbulo, do NOT put him into assault. At the end of the movement phase, make sure he is 2" away from the DC, and preferably out of LoS from enemy guns. Send in the DC and watch the mayhem. If you absolutely MUST send him into assault, it is ok. I have used him to charge in and finish off squads when needed. But it is almost always better to keep him out of CC. Simply because he is able to heal, but NOT while in CC. If you used your heal on your opponents turn, and can not use one on your turn, and the squad you are fighting is close to death, charge him in to finish it off. you might also want to get him into CC just to allocate wounds on to him. Especially later in the game. He has an Invul, and only cost 100 points. He is a much more expendible model then Dante. If it is getting close to the end, and you need Dante to live, get Corbs in there and put the wounds on him.

When to use his heal:
Save it for Dante, Death Company, Himself, Power Weapon/Fist in that order. Do not use it on normal infantry unless it is the very last wound of the turn and all attacks have been dealt. It is always better to allow an infantry man to die and save it for a DC model or Dante then to use it on a grunt, then watch a DC go down from the next round of shots.

And there you have it! Corbulo is invaluable to your Blood Angels army. If you are playing a small force, he is the ONLY choice. At 100 points, he is the strongest, cheapest commander available. He should pretty much always be in your army. Get him in a Rhino, and keep him safe. Move the rhino up with your assault forces, and grant every one you can that bubble of Furious Charge. Unload him only if you have to. Assault with him even less. Sacrifice him to save Dante. Keep his rhino within 6" of your main assault forces for heals. He CAN heal guys locked in assault, so long as he is not locked in himself. You need him to control the DC, and if you are using a DC Furioso, that as well. Keep the Dread close to his Rhino until it no longer matters. You will know when that point arrives. Just about when your opponent starts squirming and whining. Enjoy!

JB

How to Win Warhammer 40k: Blood Angels Tactics


Hey Folks! So, after working on this blog and developing my army and tactics for about 9 months, I have started to turn into some sort of expert on Blood Angels. There simply are not many sources for info on them. The result of this is that the Blood Angels have been rendered down to a low tier in the 40k world. Well BS on that! I have made it my mission to squash that squig starting NOW! Here is the first post of many on Blood Angels tactics, that will teach you how to play warhammer 40k, and how to win warhammer 40k.

I will begin with a question from a reader.

Oh hey, Jawa, quick question, I just got my Dante, primed and ready to paint. I'm bringing him to a game on Sunday, wanted to know how you field him. Attached to a unit or alone hiding behind stuff, ready to pounce? I am thinking of attaching him to a 5-man jump pack assault squad (troops)? I'm going to two games, could be either against Necrons, Orks or Chaos Marines Noise Marine spam. Thoughts?

How do you play Dante? Do you field him at all? First of all, a resounding YES. Play him. He is expensive, but worth every point. If you are playing 1750, Dante should be on the table. Dont bother with some generic captain with weapons... spend the extra 50 points, and get the MAN.

I want to begin by saying that this Dante guide is assuming he is being granted Furious Charge from Corbulo. If you are taking Dante, take Corbulo. Get him into a Rhino, and keep the Rhino close to Dante. You give him FC, you can heal him, and you can unload the Death Company to help him if he needs it. All from inside the Rhino too! More on Corbulo in another post.

Dante's Gear:

Perdition Pistol. God Pistol. Pimp Pistol. It is a meltagun that counts as a pistol in Close Combat. Enough said.

6 attacks on the charge.

Axe of Mortalis. Master Crafted Power Weapon.

Artificer armor 2+ save!

4+ Invulnerable save.

Death Mask of Sanguinius... -1 Bs and Ws to all enemies within 6". That means he will pretty much always hit on 3.

Jump pack!

And the Creme de la Creme... all Blood Angels within 12" of Dante get Preferred Enemy... which lets them reroll misses in Close Combat. To hell with a Chaplain... Dante gives Litanies to EVERY ONE, EVERY TURN. (Within 12") But if you are playing your Bloods right, that will not be a problem.

Tactics:

First of all, do NOT attach Dante to a squad. Keep him close to one or all of them, but do not attach him. Why? Because you can hide him. Advance your Baal Preds, and yes every BA army should have Multiple ones, keep him right behind it, and jump him out when the time is right. Or, advance him behind a rhino filled with assault troops, and same thing. If you attach him to a squad, it is nere impossible to hide the whole thing. Therefore the squad will be targeted, and shot with every thing on the table that can reach. Of course no single shot at a squad will kill it, but it is the multiple hits that add up. And with enough shots fired at a squad he is attached to, he will have to make saves eventually, and battle cannon templates will be able to hit him. Keep him hidden, and unattached.

Once you have gotten him into range to attack, consider him expendable. Now that he is up in the lines running a-muck, it is time to advance the rest of your army, and win the game. Rounds 1 and 2 should be getting him up into range, and he should be assaulting in round 2. Idealy, he assaults at the bottom of the turn, but does not kill the squad. Then in your opponents assault phase you finish off the squad, and massacre, then move and assault a new squad on your next turn. Plan your assault. Do not finish off squads too quickly, leaving him stranded and open in the middle of the terrain. That means you have to measure how much you shoot at the squad he is assaulting, if at all.

Follow this guide for determining whether to shoot at Dante's target.
A. Measurement. It very well may be that he will be on the outside edge of 6" away. If it is possible that your opponent can pull off the one guy that leaves the squad in range to assault, DO NOT shoot at it. Even if the squad is large.

B. Number. If the squad is full. 10 or more... fire away. The magic number is seven. Dante can and probably will kill 4 to 6 normal marines a turn. Lesser beings will be more. Ideally, you want to allow for poor rolling, and leave him with just 2 or 3 to kill (half of his attacks) on your opponents assault phase. Assaulting a squad of 7 is the perfect number. 6 might mean you wipe them out completely, leaving him stranded. 7 means that you will probably be left with 2 or 3. Less then 6? Do not shoot the squad at all.

So now we go on to what else to do with Dante.

While he is on the table, there is a 2 FOOT diameter circle centered on him where every squad with a model within that circle at the start of their assault phase will get preferred enemy. I cannot tell you how huge this is! I believe the BEST use of this is with a Death Company Furioso Dreadnought. Keep Dante as close as possible to the Furioso and Corbs. Use them to cut out your opponents heart! How about 7 attacks from a Furioso, hitting on 3, and rerolling misses at initiative 5! Bring on those Carnifexes and Ironclads! Through luck, I once managed to get my furioso base to base with two Ironclads on the charge... I split the attacks... 3 to one and 4 to the other... destroyed them both! They didnt even get a swing in.

So here is the minimum deal. Put your DC and Corbs in a Rhino. Advance the rhino, supported by at least one Baal, follow it with Dante well hidden behind the tank. Use the tanks to give your Furioso a cover save. Send them right at your enemies heart. If used properly, Dante can kill 3 or 4 squads or vehicles on his own. In a game against some Tau recently, Dante killed a squad of Fire warriors, then a squad of suits, then a squad of Broad Sides, then finished up with that fire warrior squads transports! He is that insane. Once your army is in the thick of it, risk Dante. Be aggressive. Try to pop tanks. Send him into large squads. Don't forget to subtract 1 from the BS and WS of any enemy model within 6".

If you think he needs a little help, it is ok to keep an assault squad near by to join him. But DO NOT join him with that squad until it is time to go to assault. That is simply done by making sure they are within 2" of each other at the end of their movement phase. I almost never join him to a squad, but I may use him to support assault squads. I will send him into a weak squad, and my assault squad into a stronger one, he wipes up the weak one, then next turn assaults the other one, finishing them off and freeing up the weak squad.

Always if possible, make sure that he will NOT wipe out the squad he attacks until your OPPONENTS assault phase. Don't send him against very weak squads on your turn and leave him hanging in the open.

Remember, while it is ok to be aggressive with your Dante, it may pay to keep him back as well... I know, contradictory... but true. That preferred enemy is invaluable. It is all situational.

Get him into assault turn 2. Dont fear jumping into large squads... just make sure you get him some help if he needs it. He is best used taking out squads that are holding objectives and enemy commanders.

If you can get him base to base with an IC... do so and take advantage of Furious Charge from Corbs. That will probably give you the drop on all but the most powerful commanders.

Ok, that is a lot of info. Digest it, let me reread it, and I will edit it as needed. This is a work in progress. JB.

Battle Report: Blood Angels vs Cantor Marines


First game in over 2 weeks! Today I got to play against Burt, a member of our club. Burt is known for being a little surly, but truely, I think I am one of the few guys who "get" Burt. He is always fun to play against! But if you dont understand him, it can be a little intimidating. The best part of playing Burt is that Fritz and I have messed with him so much, that now he always suspects something is up. :) I might add, that Burt is a fellow Blood Angels player, using a Flesh Tearers build. I also give him credit for showing me the Way of Sanguinius. It was a game against burt where he methodicly destroyed my army from range, while I was helpless. That was when I was all jump packs. Soo, thanks burt, here is a taste of the fruits of your labor...

1750 Blood Angels vs Cantor Marines

My standard list vs Cantor, 3 Drop Pods of Sternguard, one of which was completely jacked out with Storm Shields, lightning claws etc, a 7 man Honor Guard, each with a power sword, and two tactical squads with Razor Backs, combat squaded.

Mission: 3 Loot Counters
Deployment: 12" table edge.

Burt won the roll and deployed first. He placed his 4 combat squads and 2 RB in terrain. I reserved all.

Turn 1:
Burt brought in 2 drop pods. One was his HG which came down on the objective nearest me. The other came down on the third. They were deployed in a triangle, with one in each of the left corners of the board, and the third forming the tringle in the middle. So, at the end of turn 1, Burt was holding 1 objective, and contesting 2. I dont know off hand if Cantor makes his Vanguard vets troops, if he does, then Burt was holding 2 and contesting 1.

Turn 2:
On Burts turn, neither of his pods came down. He simply moved his guys to secure objectives and held firm waiting for me!

On my turn, travesty. Only one Baal and my Furioso came on. It was at that time that I noticed his HG had no power fist. Target priority acquired! I moved in, charging my FD at the HG, and my Baal providing fire support. I was unable to get to them this turn, but next turn he would be in assault...

Turn 3:
Burt brought in another pod... these guys came down right ontop of my forces. The sternguard jumped out, and shot Melta guns at my Baal, but only stunned it. He had no other shots that could hurt me this turn.

On my turn, all but a Rhino and a Baal came on. Game on! I clustered my forces on the left side of the board, and bumm rushed his HG and the SGV squad near the edge. I rolled in a Baal, and did some shooting at the squad that Dante was about to assault. I wanted to wittle them down to 5 or 6 so Dante could cut them down on the charge. My furioso moved up on the HG in the building, and flamed/melted them. My troop rhinos continued their left flank end around towards his other objective. IN the assault, Dant cut into the SGV and with the help of Corbulo giving Furious Charge, cut them down. My FD needed a 3 to get up to the next level and assault the HG, and I got it... just barely. Unfortunately for them, they had no power fist, and artificer armor does not protect them from a Furioso Dreadnought getting in 7 close combat attacks with preferred enemy. They all died as well, and my dread massacred back down to ground level, leaving the objective open for my tactical sqauad to come up and claim.

Turn 4:
Poor Burt would suffer some horrible luck on his shooting. He saw my charge on the left and dropped a pod full of SGV right in the path, and moved up a Razor to try to stop me. It seems he caught my disease, and rolls 1 to wound with Las/multi shots. Sadly, he would merely manage to stop my Rhinos from shooting this turn, and also a Baal.

On my turn, things would turn ugly I started to break out. My tanks were hemmed in by drop pods and terrain. Burt objected to my dread pushing his way through the ruins, so we rolled off and the dice said the furioso could not and would have to go around the ruined wall and drop pod. Nope, not a Blood Angels dread. Dante jumped up and over the pod and wall, and landed in range to melta and assault a Razor that had moved up to intercept My vehicles jockeyed around in the confined space making room for the Baal to clear the way. HE moved out of the terrain, and sized up the blocking Drop Pod. In my shooting, a Baal knocked the gun off the Pod, and Dante stunned the RB. Then on the assault, my dread tore into the pod. 6 penetration shots later, the pod was gone... exploded and my way was clear to his other objective. The Dread massacred up to where he would have been had he just gone through the wall! Poetic Blood Angels justice.

Turn 5:
Desperate now, Burt moves out men away from his held objective. A combat squad fires on Dante, and kills him with a Melta gun! Sadly though, this put them in range for a wild charge from the furioso. He also fired shots at the dread with a Lascannon, but again failed to hurt him. Unfortunately for Burt, Dante would be his only kill on the day.

On my moving turn, I moved a rhino up and around his pod on the left, tank shocking the vets in the way. He made his leadership, and elected to just move them. Having no place to go but back, he pulled them out of the way as my rhino swung a right and moved into claim the now vacant objective recent held by the tac squad that vaporized Dante. I moved up my dread, and supported him with Corbulo in the DC rhino. My tactical squad moved up into the ruins to claim my second objective of the turn. With my last movable rhino... the third stalled, I tank shocked the vets again just to dispense with them. Burt pulled them back again, and I prevented him from possibly surrounding the scoring rhino in assault. In shooting, I unloaded a Baal on Cantor's squad hiding in the middle, and killed a couple. The drop pods prevented me from shooting all 3 at them. I had to settle for taking the guns off the pods.

Turn 5 ended with me squarely holding 2 objectives, and him holding none. I rolled a die, but the result would bring the game on to turn 6. However, Burt had had enough.

He had a scary list, quite strongly tooled out for assault and death. But his weakness was his immobility against my super fast and shooty army. He put a jacked out squad of Vets with Storm Shields, claws, powers and cantor, right in the middle of the table on an objective that they could not even hold. That was probably 500 points that did nothing but take casualties. He put an Honor Guard squad on the table each with a power sword, probably blowing another 380+ points with the pod, but their lack of a power fist left them dog meat when my Furioso got to them. He also placed 3 combat squads far off in the corner where they were useless. Sure it is easy to armchair QB a game like this, but the reason I say this stuff is that it points out a major strength in my army! Burt is an experienced Blood Angels player, but was not prepared for my tactics. The combination of fast moving rhinos, and a small but VERY strong assault force took him completely by surprise. The 3 Baal Preds, while never fully unleashing their fire power due to glances and obstructions, were a constant worry for him.

A streak of good luck would have made the game much different for him, but that is why we roll the dice! Good game Burt!

Q and A. Question from a youtube subscriber, posted with his permission.

I received this email from one of my youtube subscribers, and I asked him if he would mind if I posted the response here since it is information that all could benefit from. He didn't mind. So, here we go!

Question/comment:

no offence but i dont see many prime units that are pretty much needed in a blood angels army. first i dont see atermie squad they are primo choices for the army your going for. 2 shots with storm bolter. base 2 attacks + 1 for the power fist. and add an assult cannon for a lot of good shots at enemy units with just 1 model. add in some chain fists make your chances of penetrating a tank better. you think that power fist in your assult squad can pop open a landraider?
another thing is you are using a rhino transport for a 5 man squad. double them up or get razorbacks to get that much more shots on the field. what happens when a rhino blows up. you roll a number of dice to see who lives. rolling only 5 dice gives you a good chance of living. rolling 5 dice gives you a good chance at dying too. they may not have over charged engines but you only get that 6 inches by chance. and you have all thos assult squads but took them off their jump packs yet you want a fast moving army. its good to have a fast moving army but it's even better to have a fast moving army with a lot of shots. baal preds get over-charged engines and you can put them with assult cannons and 2 heavy bolters. thats 10 shots coming from a single tank.


Let me begin by saying, my army is optimized for speed and torrent of fire. After hours of play testing, I have come up with the strongest Blood Angels army I can that exploits the 5th edition rules. Simply put, the game is about taking or contesting objectives, not about killing your enemy 66.6666 % of the time. The other 33.333% of the time is about simply ending up with one more kill point then your opponent, which is only benefited by fast moving vehicles and torrent of fire.

Having said that, allow me to discuss some of your must have Blood Angels choices. A Terminator squad is a great choice. The 2+ save is spectacular and their possible fire power can lay down the law. However, lets look at points. For 230 points, I can put a 5 man terminator squad on the table with an Assault Cannon. (+1 death company, more on my thoughts about DC later) Counting points, that is 12 shots possible, including 4 STR 6 rending shots all at 24" range. A single Baal Predator can move 6" and unload 12 shots, half of which are at 36", almost all of which are STR 5 and above. Not to mash the numbers, but a Baal Predator can unload better fire power then a terminator squad, but can move faster, and has better range. Sure, a single shot can kill a BP, but a single Vindicator shot can knock out a Terminator squad (So can a Baal Pred)!

Lets take it a step further. Take a jacked Baal Predator from my list at 150 points, and add a Land Speeder. For just about the same cost as that Terminator squad, you now have a Baal Predator and a Land Speeder with a Multi Melta and Heavy Flamer. Two very fast moving units that could possibly land 22+ shots, almost all of which will wound on 2 or 3+ and about 25% of them possibly denying saves. Oh, and at the end of the game, they can move 18-24 inches and contest enemy objectives. Those pesky objectives again. If you take a Terminator squad without a Land Raider, the minute they are out of cover, they will be hit with every AP shot on the table, and die. Throughout a game, they might get as far as a BP/Speeder combo can go in one turn, and will maybe drop their fire power once or twice. Bottom line: Terminators have no place in a Fast Attack army.

Yet another step further. If you are going to take terminators in any army, they should take advantage of a maximized squad riding in a Land Raider, and use Space Marine Storm Shields for the 3+ Invul. But wait, Blood Angels Terms cannot do either. The BA LR can only hold 5 terms. BA terms cannot take Storm Shields with the 3+. Sadly, other Space Marine armies can do the terminator thing better. Nobody plays Terminators without CCW and a LR any more. For that 580 points, I can get so much more then what they can offer. OH and power fist never gives an additional attack as far as I know. Terminators are looking at a base 2 attacks, +1 on the charge all at 1 initiative. Dante and a single assault squad will eat a 5 man Term squad for breakfast.

The power fist in my assault squad is not meant to pop Land Raiders. It is meant for Monstrous Creatures and/ore Dreadnoughts. I drive that Rhino at such enemies and if I have to, unload them and punch the crap out of them. But I rarely have to.

In fact, when it comes to enemy Land Raiders, I simply ignore them, unless I can charge my Furioso at them. Plus, I have enough Melta shots to deal with them... Additionally... based on Mathhammer, TL assault cannons are better at dealing with Land Raiders then TL Lascannons... With 3 Baal Preds, I fear no Land Raider. Last time I faced one, I exploded it with a Baal Pred.

Assault squads in Rhinos vs squads in Razorbacks. To put a squad on the table in a Razorback, I need to spend 165 points and I get no extra armor, and a Rhino with a Heavy bolter that cannot move more then 12" but only holds 5 guys who have bolters. For 170 points I get a Rhino that can move up to 18" with extra armor, and contains an assault squad with a power weapon. Is the loss of that power weapon and fast movement worth a few extra shots? I run 3 assault squads in Rhinos, and I move them up on to objectives, WHEN THE TIME IS RIGHT, and park them. To get at them, the enemy has to first pop the rhino, then kill 5 space marines who are now taking cover in the destroyed rhino. 5 Assault marines with Jump Packs are a target, who can pretty much be shot at by any gun on the table and wittled down to nothing by round 3. The odds of hiding them behind something, while advancing are pretty much nil. Putting them in a Rhino gives them more mobility, and survivability. That is based on fact, proven and tried. Before I added my rhinos, my assault squads were cut down by arbitrary gunfire from grunts that would not even hurt a rhino. Now, they almost always survive the entire game. In 5th edition, the game is about taking and holding objectives. Jump packs simply are inferior to a rhino at this role. OH, and there is the Tank Shock ability. A Rhino with Extra Armor can tank shock from 18" with a 50% chance of survival! That is fantastic! I Tank Shock every chance I get. Move your rhino 18", tank shock... if your tank shock is successful, the squad falls back and you follow them off the table. If the tank shock fails, your squad gets out and goes into assault next turn, probably killing any thing not in power armor.

These tactics have been explored in depth in other posts on my blog, so I will not get into them much more. But to lay it out, assault squads in Rhinos are simply faster, and tougher then assault squads with Jump Packs. I do not rely on my assault squads to do any thing but take and hold objectives, something that they are better then jump packs troops at. I rely on Dante, my Death company, Furioso, Speeder and Baal Preds to do my killing. The fact that I can unload an assault squad and charge a squad with a reasonable chance of killing it is a bonus.

Simply put, the army you are talking about is more easily fielded by codex marines then Blood Angels. If you try to compete with them, you will lose. Blood Angels are strongest using speed, and torrent of fire, coupled with precision assault power where needed. Leave the overwhelming force to the Ultravenamanderfistiscars.

JB

Honor Guard Update 5. www.jawaballsproductions.com


Ok, in this update, I am playing with an internal lightsource coming from the glow on my power fist model. I drasticly enhanced the brightness of the glowing power fist, and then used those same highlights to shine on the armor. I made some circular shapes on the helm and edged it onto the edges of the armor, and almsot covered the red of the fist with blue highlight... Did I do to much? Is it just too messy? Ive never done this before... can any one think of any white dwarf articles where an artist did something similar?

I attached the shield onto the arm of the champion, but am not sold on the arm pose. This arm is extended out shooting, rather then drawn in using the shield as a defense. In a way I kind of like this though, it is different from how you usually see combat shields on assault squads. It is almost secondary to his main intention... "screw the defenses... kill that genestealer!"

Any input? At this point, feel free to be uber critical. Any input is ok. It will help me look at the models from different angles. Thanks for all the input so far!

Honor Guard Update 4. www.jawaballsproductions.com


I am uploading 3 more pics. Here is my apoth, standard bearer and champion. The combat shield is at his feet. I am painting a unifying checker design on all 5 models, and will design a new banner for Dante with a checker on it to bring them all together. I dont know, but will probably do the lower legs of the power fist guy, or his fist itself... and on the last guy I will have to do one more part, maybe his legs and the fist on the 4th. I will post more pics of the jump pack checkers soon!

Honor Guard Update 3. www.jawaballsproductions.com


Ok, so, here are a few update pics of my honor guard. On the power fist, I am playing with adding a blue glow to the metallic areas of the armor coming from the fist. I painted up most of the Apothecary, adding some checkering to his chainsword, and doing the best I could with the white. I will be adding some varnish to it which should hopefully keep it from looking chalky. And I added the jump pack to the standard bearer. I will be doing hand painting on all the jump packs. One one side hand painted variantes of the Blood Angels icon, on the other, I'm thinking the second company winged claw holding the chalice, with the tri line red and yellow pattern behind it like on the banner. Keep checking back! I am taking LOTS of pics and videos, so when I am done I will be making a whole series of them on this project.

Honor Guard Update. www.jawaballsproductions.com


Here is an update of pics!

Need Help with Honor Guard


Hey guys, I need a hand! I am painting my new honor guard, and the standard bearer has a larg optical piece on half his face an one eye. Does any one know of an article in White Dwarf or online that discusses how to paint optics? Not just the lens, but the casing and the entire unit. I will get a pic up here when I get home, I am on my laptop now and dont have my cam here. Any thing come to mind?

Recent lesson on vehicle facing.


In a recent game, I learned a lesson about vehicle facing and cover saves. My opponent was trying to shoot at the Baal Pred with the Cherub on the front with a Lascannon. He was close to 4 feet away, almost in the extreme opposite corner from where the tanks were. We did not measure it, but I believe he was in the vehicles "Side" facing. He could see none of the side facing because it was completely blocked by the black rhino. But, he claimed that the rules supported that he could shoot at the vehicles Front, since he could see all of it, and he was right when we looked at line of sight. He claimed that since he could see 100% of the vehicles front face, he could take a shot with no cover save and quoted a rule, and thumbed through the rule book and read some segment of the cover save rules.

The rules on "Facing" were unclear to me at the time. So after asking him to explain why I got no cover save even though he could only see about 20% of my tank and failing to understand, I relented and accepted it. I prefer to save rules discussions for after the game instead of spending 20 minutes looking up and interpreting a rule during the game.

After reading the rules myself, and digesting what they said, I have come up with this.

A model fireing at a tank must challenge the armor value of the side that he is "Facing". That means, based on a diagram in the book, you figure out which side of the tank is facing the model and that is the one he has to attack. It goes on to say that in rare events a model might not be able to see any of the "Facing" side of the tank at all, yet may still see another side of the tank. In that case he may choose to fire on the the angled "Facing" but the tank will get the benefit of a 3+ cover save.

So, we resolved the matter incorrectly. Insead of my getting no cover save at all, I should have gotten a 3+! The first thing for us to have done would be to determine which "Facing" of the vehicle the attacking model was on. In this case, we would have placed a the end of the tape on the Back Right corner of the tank, and extended it out over the Front Left corner of the tank, and then off into infinity. Which ever side of that line the model was on would be the "Facing" He had to attack.

This is quite valuable because now I know how to determine exactly which side of my tanks my opponents can shoot. It was always a little grey to me. I tend to find my enemies at angles where they can see the side and back of my Baal Preds, and of course, they try to choose the Back! Now using that simple diagram, I can say sorry sucka! You have to shoot the Side, or Front for that matter if they are on that angle... It also helps to clear up cover save issues.

Comments? Input?

JB.

Battle Report: Blood Angels vs Chaos Undivided double Lash


Last night I had the pleasure of playing Black Matt's tournament list. We both knew that this was going to be a tough game with nothing less then our very souls on the line! Matt has been playing 40k a long time, and on top of being the best painter I know, is wiley with the rules and tactics. Very little slips by him and really, his only fault is that he is a bit of a rule stickler when it suits him. Though that can be a strength in tournaments! For example Line of Sight. If I intend to shoot any of his models, I better have a laser pointer because he will NOT grant that I have LoS if there is any question to it. He is going to make you fight for every kill, rest assured.

Having said that, I need to admit that I have a bad habit of flaming my opponent if things don't go my way and I want to say that like James (see Ba vs Ultramarines), Matt is a friend. It takes a man to admit he has been bested and I sometimes make excuses. So, I am not flaming him or making excuses, please don't mistake this as such. I also have my own faults that might cause issues in games. I tend to be a little loosey goosey with my measurements. On occasion I may move a model too far here and there. But just as often, I will short myself so I feel there is balance. I suppose like any player, I tend to use rules when they suit me, and argue that same rule when used against me. I also have a habit of being hard edged in my arguments, which comes off as abrasive. I suppose this can lead to me coming off as a little unapproachable and uncompromising. A bad trait when a LOT of 40k is based on rules that are subject to interpretation at best. I will say though, that so long as my opponent is cool with me, I wont nit pick him. But once he sets that tone and "stickles" me, I can be pretty good and redundant at returning the favor. Not really a great trait.

Now for the batrep.

1750 Blood Angels vs Chaos Undivided double sorcerer with lash list. He has 4 squads of Plague marines in Rhinos, 2 sorcerers attached to squads, and 3 squads of two oblits. The list is Cheeze! But it is a highly competitive tournament list. I respect it.

Mission: Kill Points
Deployment: 12" table edge.

I won the die roll to go first, and elected to take that first turn, and deploy. The cover on one edge was highly suited to this game because the other edge had little cover in the deployment zone. I wanted coice of edge. Plus I wanted to try to pop a rhino turn one. Knowing how Matt plays, and how this mission goes, I knew it was going to be a slug fest, but I also knew he had a big advantage. Those 6 Obliterators can use any weapon they want, so that is 6 lascannons if he chooses. In a game where we both have a lot of Rhinos, that is a tactical advantage for him. If we both decide to sit back and shoot, he wins. I have 1 lascannon to his 6. So I had to press the advance with my Baal Preds, knock out his Oblits, get the edge in kill points, then fall back.

Of course, he won the Seize the Initiative roll... an ominous beginning.

Deployment:
I deploy, clustering my units in the right corner of my edge. One thing about massed firepower is that you have to keep it all together to get any thing out of it. He matched my cluster, by doing the same in the opposite corner. He did place an oblit squad on the edge across from me though. I would have to kill that one first.

Turn 1:
On his moving he put his Oblits in the far corner into position. Game Note: in these terrain pieces, we were treating them as multi-leveled structures. So, you have to be able to move at least 3" to go up a level. Matt had his Oblits behind cover. He rolled the terrain test, then moved his models the full distance up and over of that measurement, without taking into consideration that 3 of those inches had to be used getting up to the second level. (he was trying to get his oblits to the edge of the terrain to not have to grant me a cover save for shooting through it, which was wise) I didn't say any thing because that is the sort of thing that is not worth creating animosity over...

He does some shooting, but fails to hurt any thing due to cover saves etc. We also have a short discussion about why my vehicles were not granted cover saves despite the fact that he could see less then 50% of them. I didn't understand the rule, but for the sake of playing the game, just accepted it. I will have to read that after...

On my moving, I push up. I angle my tanks for shots at his well hidden Oblits, and move the tanks with no shots as far as I can. One of those tanks had to navigate through terrain pieces. Matt objected to that tanks movement, and requested that I make a terrain test, or remeasure it. Then being unhappy with my remeasure, he came over and measured it himself. Basicly, the tank had to move forward, rotate left, move forward, rotate right, move forward. The end result was that I moved my tank a little too far... about half an inch. Matt gained half an inch... (Or I lost it, but I am looking at the optimist side here. :) But more importantly, I want to point out that Matt flipped the "stickler switch" to ON after I ignored his breach of movement with his Oblits. The rest of the game would come down to exact measurements for sure.

In my shooting, I had a huge stroke of luck, and got a shot at one of his Rhinos with my Lascannon. From the angle, I could just manage to see about 52% of the vehicles facing side. No cover save for YOU! I hit, and EXPLODE the rhino. It had one of the Sorcerers in it and he was now going to be on foot.

End turn One, 1 kp for me 0 for Matt.

Turn Two:
Matt does some moving to get good angles and cover saves. He is a master at escaping line of sight while still being able to shoot at what he wants. He ran the sorcerer back to another rhino. (I dont remember if it was this turn or turn 3, but it doesnt matter)

Here is a question I pose to the reader. He ran his sorcerer to within 2" of an access port of a rhino containing a squad, then embarked the sorcerer into that rhino. Glancing at my recently "stickled" tank, I suggest that by the rules, he would need to disembark that squad in order for the sorcerer to join it. The rules state that a transport may only hold one squad. It also states that an IC needs to finish its movement within 2" of a unit in order to join it. At the end of his movement, he was within 2" of a rhino, not an infantry squad. At the end of his movement phase, that IC was still just a single unit. He was not joined to any squad. He cannot join a rhino. Trying to embark that rhino means that for that moment, 2 units were trying to use it. I suggest that based on the rules for a transports carrying capacity, he would need to disembark the squad in order for the IC to join the squad, then next turn, the now single unit may get back into the rhino and be on their way! I know, I was being silly. Logic dictates that there was no reason why that sorcerer could not just open the back door to a rhino and hop in, thus joining a squad. But hey, I'm not the one who set the "Stickle Switch" to ON. Matt aggressively objected, flat out refusing to comply with that rule or entertain the discussion. Without really intending to try to enforce that silliness, I carry on with the rules lawyering for a bit, then let the matter die. I was just trying to make a point that it sucks to play a rules lawyer. Had he not pushed the issue with my tank, I would have not said a word.

But the question remains! How should that have been resolved? If an independent character wishes to get into a rhino that is occupied by a squad, does that squad need to disembark in order to let him join them? Or can he just hop in? Him entering the rhino is basicly like two squads trying to enter a rhino that can only hold one... Input?

So, on with the game. Phew! On his shooting, he still fails to do any real damage. He did knock a gun off a Baal and hurt my speeder though, it would have to retreat next turn. Luck it seems is still shining upon me.

Bottom of Two:
I charge forward. I now have my Baal Preds in range to do some damage, and am setting up his lone Oblit squad for a turn 3 assault. It becomes obvious that he is going to lose that squad for sure. I surround it with juicy units and force him to make a choice about what to shoot. In my shooting, I manage to kill another Oblit. (again, may have been turn 3 but it doesnt really matter) I would spend the rest of the game trying to get that survivor.

End of turn two: I have 1 KP, matt has 0

Turn Three:
This is a big turn. Matt does some more jostling for cover saves and shots. He attempts to move a squad of Plage Marines up on top of a structure... He rolled a 5 I believe for movement and proceeds to put his models 5" away from where they were, but on top of the structure... "Stickle Switch ON" At this point, I bring up the fact that he needs to take into consideration that to get up consumes 3" of his movement, so he would have to push some of those models back... See how that works?? :) Being distracted, he put one of the squads melta guns in the back by accident, just thought I would note that here.

On his shooting, he finally manages to knock out a rhino and earns his first KP in perhaps his first mistake, tries to get the juicy shot at Dante rather then going for the sure kill point by shooting then assaulting a Rhino. Dante was definitely out of range for the assault. He hit and wounded with two melta guns, but Dante made his Invul saves! Sweet!

Bottom of three:
I set up for assault on his lone oblits. I move Dante, Corbs and the DC into range, joining Dante to the squad. I also attempt to move two tanks through terrain, and roll 1 for both... imobilizing them. This was bad because one of them was VERY close to his melta guns. Drat. I would no longer be able to move it back, and would have to play a defensive game from a horrible tactical position... I do some shooting, trying to kill that oblit, but fail to hurt any thing. Then I charged the lone oblits with Dante, and he kills them both. I consolidate the squad in cover.

End of Three: 2KP for me, 1KP for Matt

Top of Four:
Matt moves up a flanking rhino and unloads them. They manage to get a sneaky LoS at my speeder through a building, and he knocks it out. He also tried to fire his two melta guns in the squad that tried to move up on the building last turn. He realized that one of his melta guns was out of position... Seeing that it was an accident, I agree that he can move it to where he wanted it... See Matt, I'm not a dick despite you calling me that! (Matt got angry with me a little earlier because I "Stickled" him on rhino movement and disembarking in order to lash... no need to get into it.)

On my turn, I advance my Baals a bit more, trying to kill that last Oblit again, and knock out some Rhinos... but I would fail to do any thing. I start to see that if this game does not end on turn 5, I am going to lose. I did manage to Imobilize and Weapon Destroy a rhino. All I would need to do is scratch it next turn for a KP.

End Turn Four: 2KP for me, 2KP for Matt. This is turning into a tight, fun game!

Turn Five:
Now the game has sort of rendered down to a match between my 3 Baal Preds and lascanon, and his Oblits and Melta Guns. Sadly, he has the advantage here. He moved his Meltas into range but failed to hurt me. I see now that if the game does not end on turn 5, it is over for me. I will not survive another round of shooting.

I accept fate, and expose my tanks. I move them into range for maximum fire power and unload on him. His fleeing Oblit took a lot of shots, but did not die! I also failed to hurt his Rhinos... that would seal it for me. Turn 5 ends, with each of us having 2kp. I roll the die to end the game hoping for a draw... but roll a 5. Game goes on.

Turn Six:
The short of it is that he stunned my remaining tanks, and killed one. I attempted to tank shock so I could maybe Ram a rhino, and he successfully Death or Gloried. I know, desperation... Basicly, I had to Ram and destroy a rhino, and destroy the other with my lascannon. But it was not to be. Game ends with Matt claiming victory! This time. Dante and Corbulo lead a fighting withdraw and the score will be settled...

So there you go, I posted a loss! A lot of guys on youtube complain that all I post are wins... here is proof! But thats ok, it was a close game and Matt has a tough list. I am not ashamed of that loss. Great tactical game man! But I do have to say that there was an issue that did leave a very sour taint in my mouth. Rule Stickling is part of the game and I can deal with that, it is even fun sometimes... But there was something else about the game that disappointed me. I think Matt realized after what it was and was remorseful. He gets super emotional and a bit caught up in the moment some times. Just remember man, while I might inadvertantly move a model farther then I should on occasion, and try to squeak out LoS where there might be none, I am not going to cheat or lie to you dude and I feel very strongly about my word...

Ok, I will post the vid asap. JB.

JB

As if I did'nt already have enough projects... www.jawaballsproductions.com Blood Angels Chapter Banner and Dante's Honor Guard for Golden Daemon


Well the title was a mouthful, but it is as it is. I plan on entering two items into the Golden Daemon this year for my first ever entries. Item one is a Baal Predator that I will be entering into the Vehicle category, that tank appears in another post. Something I have been toying with since I started Blood Angels was a GD quality Dante and Honor Guard. SO, I decided to go for it.

I am starting with a Vanguard Veteran squad. One figure was great for a standard bearer. He was holding a two handed power sword. SO, I drilled out the pommel of the sword from his two hands, and inserted a brass rod on which I will affix the Chapter Banner, which I started laying out the base colors for.

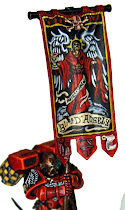
For the Chapter Banner, I started with a picture of the banner from google, and just started painting it onto a black banner from the Command Squad sprue, using Mechrite Red and eyeballing the proportions. I used Shadow Grey to lay down the wings base, and bestial for the scrolling. Areas of shadow I left black. I really need to work on the head, chalice and whatever he is holding in his Left Hand. Any one have some insight on what that is? It looks like a banner or something. Any way...

For the rest of the squad, I am using the beakie as the Sanguinary priest. He is holding a chain sword aloft, and his left arm is attachable, so I am using the apothecary arm from the Command Squad. I cut off the blood vials from the apothecary chest and glued them onto his belt.

I added a power fist to another of the figures, and will be adding the Champion Shoulder guard and combat shield to one of the others, giving me a squad with a Champion, Standard Bearer, Sanguinary Priest, Power Sword/Plasma Pistol and Power Fist.

I started painting one of the models. I am using a black base, with careful mechrite red on the plates. Then I am layering Red Gore, Blood Red and Blazing Orange. I will probably wash some Baal Red into it too.

I want to do a new Dante. But I am considering making a whole new one. Maybe even an injured Dante being protected by his HG. But I have no clue what to do. Any input?

So there you go. Watch as I add more to this thread in the coming months. Only two months to go!

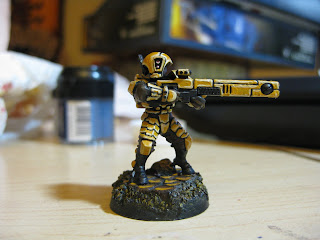
www.jawaballsproductions.com The Tau Project


Stealing a bit from Ron at From the Warp, I am going to do a thread of posts on my new Tau Project! Here is a pic of my first 3 Fire Warriors. The leader was painted with a different color from the other two. I did the center one using base black, then Tau Sept Ochre, then Valejo Game COlor Scrofulous Brown then highlights. I did the leader using the traditional GW approach of Black, then Tausept Ochre, then Vomit Brown. I prefer the first one, so I decided to do them all like that. Any input?

www.jawaballsproductions.com Trying my hand at some Tau!


SO, I thought I would give a Firewarrior a shot. First of all, I am going to make a how to paint video for them, but also, I am looking for an army that is very different from BA. I have both an Iyanden and IG army in the works, but the Iyanden will NEVER be competitive, and the IG is on hold until new codex comes out, which will be soon, but I dont want to go paint a bunch of stuff only to never use it because the dex makes it suck. Painting this Firewarrior was fun, and it looks great, in my humble opinion. Since I like the first one, now to paint a whole squad. If I am happy with them, I might have just found my new army. Any one have any advice on a killer build? I need something that can compete. I dont have to win every game, but I cant be getting rolled. I have an image to uphold! :)