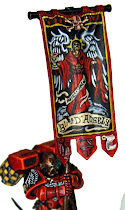
Just finished another banner! This one is a sort of custom one for The Lamenters! We have the standard white and black checks with the bleeding heart. On one of the tabs we have a custom logo, a lightning bolt going through a heart. Then there are the standard Jawa bits like the scroll and honor plaques. Finally I added a laurel wreath at the top to break up the open space.
This is one of my favorite banners to date! Scroll down for the short youtube video.
I found myself against Sean Nayden this weekend at a tournament and knew I was doomed.
I know he packs one of the nastiest assault lists I have ever seen, and knew it could only get worse with allies.
My first words to him were: "Let me guess, you added Eldrad and jet bike troops"
Yup.
First of all. This is not a gripe, it is a congrats to Sean for fielding an uber list.
I am not a Dark Eldar player so I don't know all of the ins and outs of this list. I only know it from my side of the table. And it is nasty.
First, the list does have some possible achiles heels. In order for it to be optimal effective, Eldrad has to roll Invisibility. But he has four chances to do so. So Sean has to be VERY unlucky to not get it.
Invisibility essentially gives his army a 2+ cover save to shooting.
We figured out that it would take 65+ bolter shots just to kill a single Razorwing, which costs 15 points a model.
The other weakness is STR 6 shooting, preferably templates, which preferably ignore cover, like Heldrakes I believe. A few of those could probably ruin his day.
In the assault, STR 6 hits hurt him as well. Mephiston vs his beasts for example. However, Sean is very good at not letting you do that.
Why STR 6?
Well that will instant kill his beasts. Otherwise they have five wounds a piece and absorb hits like a Detroit Lions quarterback.
Case in point:
I assaulted his beast unit with two 10 man assault squads, 3 priests, a librarian, five terminators (4 LC 1 TH) and Mephiston. While it took him a couple turns to take me out due to Feel No Pain and 2+ saves, I believe I managed to kill about a dozen bases of his. Mostly in the second wave as I focused my hits against his Wyches and their lowly 4+ invulnerable and the warriors.
It only lasted that long because Vect did not get into it until late.
Sorry I don't have any pics of the list but I did discuss the list with Sean on Video:
So there you go! If you can stomach playing this list, you now have the tools to have a shot at winning any GT you go to. Enjoy!
I had a busy birthday! Part of my present was a day of peace, during which I went to work on the centerpiece of my new Lamenters army. First I airbrushed with multiple yellows, and then sprayed some shade on it to get the yellow base you see here. I left it very subtle for now, I intend to go back and brush in some blending later. I painted the engines black and will do them up with my Jawa Grey NMM grey technique.
Before I could go on with the painting though, I had to do the cockpit.
I painted the seat and back brown then bleached bone then washed.
Then I painted all the controls and lights with multiple layers of highlight.
Then time for the pilot!
First to make sure he fits with the canopy...
Then time to give him some life! He got the same treatment all of my
vanguard vets have gotten so far. Not quite as many layers, but he still looks
good. I did the full checker treatment on the shoulder pad along with the heart symbol and I painted all the
Mechanicus symbols too. I borrowed from fantastic painter Gabe Dobkin for the eyes. I noticed that when he paints his it looks like he actually enlarges the lenses. You can see the images I used as reference HERE on BOLS. Simple but powerful!
Now it is time for the checks! You can see the subtle blending I did
with the airbrush. I mixed a little brown into my yellow for shading
then accented it with wash. I am fairly happy with the right front engine housing
and the housing over the rear right engine as well. The blending is subtle and almost imperceptible
if you don't know to look for it! But it will give me a great base to work on with a brush.
For the checks I used a ruler to grid out 1/4" marks, then a credit card as a straight edge to lay down
the lines. The ruler was too unwieldly.
Then came the hand painting! I started with a codex grey base then painted in each individual
black check free hand. The only issue was that the wing was just a tad too wide to make the checking even. You can see on the right that that row of checks is a bit too wide. I will fix that by blending yellow down the front of the wing. This is just the layout. I will paint each white check with about 4 shades of grey then a white highlight. That is the point that I will edge out the checks and make them as square as possible.
Where else will I place checks? The tail and stabilizers will get some, and maybe some on the intake on the top. This raven will have hurricane bolters, so I think the bolter housings will also be checked. I am going to magnetize the doors and sponsons so I can switch em out.
Here are some inspiration images I found:
I am kinda digging the angled checks on the tails. Perhaps this will be the perfect compliment to what is a very boxy and geometric model. Maybe I can do some subtle checks on the wing tips of the stabilizers. I am thinking about actually hacking up the tail of my raven, and creating a sort of stabilizer like you see on these... a more traditional fighter type...
The storm raven is a truly huge model to build and paint. The model itself goes together very easily, but it is a daunting task to paint it to a top level. The cockpit alone took a couple hours of work for me, but it is necessary. All too often do you see guys who short cut the cockpit and paint over it. But it is those details that a paint judge will recognize, and if not directly, subconsciously reward.
For the symbol, I am going to place it directly in the center of this field of checks. I will simply trace a terminator base and make a big circle and go to town.
Ok, then, back to work for me. My birthday vacation is wearing thin with the wife and my minutes are numbered!
But wait... Vanguard Vets cant have a banner! Who cares, when competing for Best Painted, you need to add flare wherever you can. So most of the squads in my army will be carrying a banner of some sort. :)
Here is how I did my Lamenters Chapter Banner.
First I sprayed it with Averland Yellow base color and gave it a yellow shade wash.
Then I painted the rectangular banner area with codex grey.
Then I laid out some lines using a detail brush and free hand. I eyeballed the distance and size of the squares, and just got lucky. It was just about perfect.
Then I painted in the black squares.
Then boom finished banner! :)
Actually I layered up to white, using Fortress Grey, Ulthuan Grey, and white.
Then I hand painted a circle sorta in the center with black, and relayered up to white using the same recipe.
Then I hand painted the heart on top of that with black again, then Mechrite Red, then some blood red and a bit of orange. I intend to give it some more love.
For the scroll I painted it with black first, then used Calthan Brown, and layered up using Tallarn Flesh and increasingly light layers of the new flesh and bone colors. I painted the world Lament on the scroll.
The marine is done the same way as my Sgt. I sprayed him with the yellow base first on top of black, then gave a good wash of Casendora Yellow. Then layers of Yriel and Flash Gitz with another light shade of Casendora. The winged parts of his armor I used the same recipe as the checks.
Feel free to leave questions or comments or tips! How are YOU doing your hellow I mean Yellow!
MBG here with my review of the new Stormraven, which I found to be very innovative and daringly designed.
Like it or love it the new kit is here. I started right in on the assembly, after we got our black box in (containing the Furioso, and the Stormraven), and I had a field day with this thing.
Much like the Death Star in RoTJ, we are now fully operational.
We offer most tabletop wargames, card games, board games, and hobby supplies such as paint and tools.
We also have EIGHT 4'x6' Gaming Tables that you can play on, as well as 4 Multi-Purpose tables, XBOX, Free Wifi, Drinks, and Snacks.
If you are in the area come by and check us out! We are about 1-1/2 hours from most of Virginia.
FTW Games
13176 Midlothian Turnpike
Midlothian, VA 23113
804.464.1873
Hours
Monday- Closed
Tuesday-Thursday 2pm- 10pm*
Friday-Sunday 12 Noon- 10pm*
*Mostly Close Later
If you like what you see here, head over to our FTW Games Website and go more in-depth with whats going on here at the shop, and how you can get involved!
-MBG
I would like to congratulate Rob Baer on launching his store and doing his thang! Grats man. Maybe Fritz and I can take a road trip and play in a tournament. Jawaballs
MBG here with the a summary of my current progress with the Titan Mega Build.
Well I couldn't help myself. Being a long time follower of all things Chaotic, when the Forgeworld Chaos Reaver Titan hit I just had to have it. But I was afraid that he would be a little lonely by himself in my display case so I bought two Warhounds to keep him company as well. It seemed like a good idea at the time....
Thus my Chaotic Demi-Legion was born, to ravage apocalypse and gladiator games to no end. However in order to make this plan come to fruition, I had to get my arse in gear and assemble these puppies. Fortunately I have cohorts that are eager and willing to help for their share of plastic toys!
So with a watchful eye and a devoted helper the Legion began to emerge.
Most people by now have heard that assembling these things are a pain the arse. However its mostly just the legs that suck. You really, really have to plan that out carefully. First trim up all your leg pieces from the toes up to the hip joints. Have it all ready to go and your leg build will go smoothly.
It's preferable to have two people for this operation. My helper Andy "Submariner" Holley trimmed down and de-flasher these pieces in no time flat. We used the instructions for inspiration for the leg poses (basically that means we copied it). So while I dry fitted and glued each piece Andy held the hip and legs to make sure everything lined up and the hip joint that attached to the torso would be level.
It all turned out pretty good, and you can even do this without attaching the pistons -except the hamstring one you have to attach that when you build up to the hip.
One last piece of advice. Magnetizing or pinning the leg assembly to the torso will not only give you the ability to move you titan left to right ( and make cool machine gun noises when you shoot), but lets you transport your bad boy easier as well.
I used two 1/2" rare earth magnets here. You have to try and make sure that even with the magnets attached that the two pieces they are connecting remain flush to transfer the force of the Torso assembly to the legs. These magnets will not do all the work by themselves!
Working on the torso, while its not quite as hard as doing the legs, it's still important to make sure everything lines up correctly. I also plan on going back and painting the interior. I just want to get the outside painted first because we have an Apocalypse game coming up in a few weeks that I need this guy for.
So here's a good progress shot of Warhound # 1 along with a shot of the flexibility of the torso when its magnetized. The center of gravity of the torso seems to be working out well with the positioning of the feet. It worked out pretty good I think.
We went ahead and cleaned up all the weapons I bought for both Warhounds just so we could have options to use for the upcoming Apocalypse game. I wasn't sure what lists we would be running for that so I wanted to make sure I at least planned the Titan out for maximum killing.
I left the leg greaves off so I could paint them, and the leg detail itself easier. The pistons go on pretty fast, but some we had to drill out because the casts had been a bit smooshed and the sides had jutted into the mounting hole. No big deal really, but you have to be prepared for anything I think when you are assembling these things.
I ended up magnetizing the weapon arms, so we could use whatever weapon load-out I had. The most popular weapon combo so far, seemed to be the twin Turbo Laser Destroyers. I pinned the top of the weapons mount and magnetized the bottom, again with a 1/2" diameter rare earth magnet. I also glued a small strip of plastic card onto the magnet on the weapon mount, to help prevent them from chipping or cracking- a fact learned from a previous blog comment!
Now that the assembly was complete for the most part, I needed to wash the resin down so I wouldn't have any problems with the paint adhering to it. It's a good idea to do this because when resin is cast, a small coat of mold release is left on the model. Sometimes some of the mold comes off and gets wedged into bits of detail as well. It all can make paint run off, or not even stick at all. So it's best to scrub this thing down with soap, and let it dry overnight.
By morning it was completely dry, and I started priming it up in the base color I wanted. I used Army Painter's Necrotic Flesh. It's a lighter green color, like Dead Flesh, which is fine because I'm going to wash it with darker colors anyways.
So that's it so far. Primed up and ready to go to war!
-MBG
Checkout the in-depth articles complete with assembly tips and tricks. Follow along on the progress of the Titan Mega Build with the links below!





.jpg)