
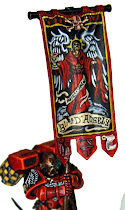
Here are a bunch of pics showing a lamenters update!
 |
| Lamenters captain |
I have started thinking about basing. I want to utilize LED lights in my display and some of the bases and I spoke to Chris from PoweredPlay Gaming who is a company that offers easy to use, prewired, LED light sets. He is going to send me some things to try but in the meantime I wanted to base my captain.
I decided to go with something I tried before, an LED Tea light.
Behold...

First job is to separate the lamp from the housing of the tea light. By inserting a blade into the seam and working it all the way around you can pop off the housing without damaging the delicate wiring inside.


Next up is the terrain. You can see in the above picture the base of the tea lamp. It has a blue switch on the bottom and a loose wire that holds the LED. I don't want to get into trying to pull this apart any more than I have already so I want to figure out how to use it as is. Fortunately I have these grid "sidewalk" pieces made by Lemax. They are about a quarter inch deep and come apart easily and with a little flocking sand, cover the assembly of the light fairly well.


I am using a base from Dark Vengeance that has precut holes. But I have to enlarge one of the holes to fit the switch button that will be accessible through the bottom of the base.


Plastic cutters cut a big enough hole.


Some super glue on the bottom of the tea lamp does the trick, you can see the blue switch.

Now for the ground... I cut up a piece of my sidewalk, and drilled a hole with my pinning drill where I want the LED to poke through.

Then I use my xacto blade as a drill, I put it in the holl as far as it goes and twist it around. This shaves out the hole making it wide enough for the LED.

Voila! Now the sidewalk can be placed over the LED and cover most of the housing of the tea light base.

I popped my captain off his painting base to fit him on.

Now it is time to disguise the base. I used a bit of the sidewalk that I cut off to hide the LED a bit. I will surround the rest of the exposed part with basing sand.

I then started using other cast off squares to cover up the broken bits of the base. I want it to look like a bit of sidewalk that has been exploded. It sits at an angle, and when I add flocking sand to fill the gaps should look like a bunch of blocks broken in rubble.

What else? I am using a spare Riptide head as accent. I am going to have it ripped off and laying at his feet, on a little hill of sand and rubble that is on fire. The flickering LED will not bee visibile, but will reflect off the model, and look like a little bit of burning Tau love.
Next up I will show the basing sand and finish.
I cant wait to get my hand on those LEDs from Powered Play Gaming. I have a treat in store for you when I do my Dreadnought!
Jawaballs





.jpg)