Step One:
Assemble the model! Thats right. I assembled the entire crisis suit, save for the weapons. A major divergence from my normal procedure. Normally I assemble the models bit by bit as I paint them. But these suits have few parts that obstruct other parts, plus that is time consuming. So just get the whole guy built. I did not put on the weapon options yet because I intend on magnetizing those.
Step Two:
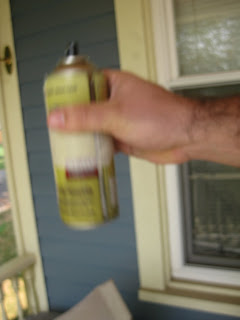
Get yourself a can of Army Painter Desert Yellow color spray primer. They don't print the color names on the can, only on the cap, so I suggest you use some tape and write the name on the can. Who the hell keeps the caps!
Step Five:
Now here is the part where you need to make a decision. To prime or not to prime? Army Painter Color Primers are just that... Spray Prime. You do not need to pre-prime your models. Simply paint them with the base color you want and you are good to go. Having said that, you need to consider shade and hue. For example, Desert Yellow is a very bright color. This will be toned down in a later step using Medium Quickshade, but some of you might like really dark Tau. In that case, spray prime your models black! Or the opposite... you may like a super bright model, so spray them white first. It is useful to know that you can get three shades of the same color, simply by under painting black or white, or leaving the model grey.
It is also useful to know how your surface interacts with the paint. Metal and Plastic react differently to spray prime. If you are painting a metal model, or a combination model, it may be useful to spray them with a black or white undercoat. First of all, to make sure that the model is all the same color, but also, paint easily flecks off from Metal. A dedicated spray prime might be a little more useful at helping the paint not scrape off the metal. Whatever you decide, try it out on an old model first. I used an old Eldar Heavy Weapon and painted it all sorts of different ways when working on metal. The bottom line... EXPERIMENT BEFORE YOU WORK ON YOUR REAL MODEL. You've been warned.
On these plastic models, I am spraying directly onto the plastic, with no under coat. When you spray, hold the can relatively close to the model. The pigment in Army Painter spray is ultra fine. So fine that it may dry in mid air! This will cause a sand paper texture to appear on your model. BAD! The way to avoid it is spray close, in quick short bursts. Never start a burst directly on the model. Activate the spray on the cardboard, then swipe the can over the model.
Spray the models with a thin layer. It is always better to spray multiple thin layers than one thick coat. There may be areas of exposed grey still. It is ok. Flip the model over, do the other side. Then come back to the first side. If you attempt to completely cover the model in one go, you will fill in details. Ive seen it happen, and done it myself. Slow and steady gets the job done here folks!


.jpg)
6 comments:
jawa baby is becomeing jawa toddler, I just found out my store actually sells this spray (did not know that anyone did) So im on the fence about using it on my chaos, Im refrencing it to my friend for black templars although.
Could it possibly be used on high elves?
-Kevinmcd28
I know you announced that you get a lot of questions, but I am curious for my marines specifically. What shader would you use for your Blood Angels if you used black primer and mechrite red as the base color? I like to be able to highlight with the same color so generally I have used devlin mud, then highlighted with mechrite later, but this shader looks amazing! Also my marines are similar to flesh tearers, they have red legs and black bodies.
REgards,
Ryan
How come you don't have a jawa suit for the jawa baby yet? :)
I just tried using their Dark Tone on some imperial fist models and it looks good so far. But either will be fine. Just practice on other models first!
It would work on High Elves too. They have a color called Crystal Blue i think coming out soon to use as a base color. Paint it blue, then paint the flesh parts using Foundation Tallarn Flesh, and paint base colors on the armor and whatever else. Should look good!
If you use NoScript (just google it) with your firefox it will stop 99.99% of ads. This blocks all java scripts from working without your permission, you just rclick on the window and either permanently add or temporarily add script permissions. Most ads don't come from whatever site you're looking at, so if you allow the scripts from one site, you can still have the ads from the other blocked.
It's an extra step but I don't use a computer without it anymore.
Post a Comment