Rediscovering Angels #7: The Predators

Hello there boyz and girlz!  What's happening.  Xaereth here again from Delusions of Grandeur, hoping to help give you ideas and thoughts on how Blood Angels can work for you.  Today I want to talk a little bit about some models that are close to lots of people's hearts:  Predators.  It's a somewhat tricky matter to talk about them, since I know that many people are completely sold on them already, but hopefully we can discuss this objectively, and figure out the best way to play them :)

The Types

So, I'm reasonably sure we all know by now which Blood Angels pred loadouts are the most popular.  But, for the random new guy reading here, let's talk about each one real quick.

Autocannon Turret, Las Cannon Sponsons

This is 'the' heavy support Predator.  Weighing in at 135 points, this guy has two S7 shots, and two S9 AP2 shots.  It's fast, and as such can move 6" and fire all heavy weapons.  People tend to think it's a big deal.

'Standard' Baal Predator

This is a Fast Attack choice, with an Assault Cannon and two Heavy Bolter Sponsons.  It's 145 points, and can move and shoot it's weapons well too.  Also of note, it can make a scout move or outflank if it so desires.  The scout move is better with its variant.

Flamestorm Baal Predator

This guy is cool, it can tote a S6 AP3 flamer, move 18" on it's scout move, and shoot after having moved 12".  Alpha strikes vs. longfangs can really hurt your opponent if they deploy stoopidly (lol).  115 points isn't much for an AV13 vehicle who kills marines without a thought.

Other Variants

Um... there aren't any.  Well, there are, but really seriously, you don't want anything to do with them.  For 180 points you can have three las cannons on a predator.  Or you can have a dakka pred with almost no impact on the game for 30 points more than your SM pals.  Neither is worth it in my opinion.  180 points is a ton of points to pay for three las cannons that can be glanced into silence.  The above builds are the ones we want to look at, from a competitive point of view.

Alright, now that the newbfest is over, lets talk about how effective they are in the field!

I'm kind of a math guy when I approach games.  It probably has to do with my stint as a poker player for a while after Iraq, but now I'm forever haunted by the fact that I can't play a game that involves numbers without trying to figure out probabilities.  As such, my first approach to Preds is a math approach.

So, let's do some maths for the AC/LC pred vs. Tanks, since that's what it's tooled for (though it can do well against some heavy infantry as well).  Shooting all 4 shots at a rhino, you're going to wreck or explode it a whopping 43% of the time, assuming it isn't getting cover.  To immobilize it, you're over 50%.  Against a Chimera, wrecking/exploding it is about 28.6%, and to immobilize it or better is in the mid 30's.

Conclusion:  It takes 2 Predators to reliably disable a rhino (assuming no smoke) and three Predators to reliably disable a Chimera.  From a math standpoint.  We all know what can happen when we roll hot.  Or terribly.

Alright, let's do the maths for a Baal Predator w/ Assault Cannon/Heavy Bolters.  Against T4 (shooting all weapons), 5.6 wounds will be caused.  This means about 2 marines will die, or 3 orks in cover.  Against a Rhino, you've got about 18% to wreck/destroy it with the assault cannon, closer to 30% to immobilize it or better (though ironically, the exact same percentage to do the same to AV12)

Conclusion:  It takes 3 'Standard' Baal Predators to kill half a marine squad in a single turn (or a longfang squad).  It takes 3 'Standard' Baal Predators to reliably disable a Rhino or Chimera.

Now we know what they can do.  I'd say for it's points, so far the Baal slightly outweighs the AC/LC Pred.  Keep in mind that the Flamestorm Baal is so variable I don't want to do math for it, since there are too many scenarios to try to do it justice.

One thing I haven't mentioned much (as if I really need to, lol) is that Predators are all AV13 in the front, and that you can take 6 total Preds if you want.  This is what the internets loves about Predators in Blood Angels, the spammability of AV13.  Many people view AV13 spam as a step lower (but cheaper) than AV14 spam.  I have to posit that it is nowhere in the league of spamming AV14, however.  Sure, it's tough to pen the front armor with shooting, but Predators are vulnerable to assault in ways that Land Raiders really really aren't.

Another weakness I must point out (since we're trying to be objective) is the one that all tanks suffer from:  suppressing fire.  If our pred sustains even a little damage, the odds are that it will be completely unusable in our next shooting phase.  This is a weakness that is not shared with ground-pounding shooty squads (such as Devastators).

So, let's say we want 6 Preds.  How much would that run us?  840 points is the damage, coming just under 800 if we want to swap out 'Standard' Baals for Flamestorm (we generally don't).  This isn't a terrible pricetag, though I have to point out to you that certain armies will be able to glance every single predator of yours on turn 1.  Space Wolves come to mind, being able to split longfang firepower, as do Guard, Tau, (Necrons? lol) and a bunch of random shooty lists.

It's really your call- Blood Angels generally need some sort of suppressing firepower, and they all have their shortcomings.  Devastators can shoot but can't stay with our army.  Preds can stay with our army, but can be glanced into submission.  Attack bikes can be insta-deathed.  Gotta pick your poison.  Preds are certainly not a bad choice.

So instead of quibbling over if they're a bad choice or good, let's discuss what types of lists could benefit from the use of Predators.

Pure Jump Troops

AC/LC- Yes
Baal 'Standard'- No
Baal Flamestorm- No

These guys can really benefit from the AC/LC, in order to pop the tanks before the jumpers get to them.  I said no to the Baals because Jump Troops already rock against troops as it is.  Another thing to keep in mind is that tanks of any kind (except Land Raiders, oddly enough) will be somewhat out of place if you plan on making full use of Decent of Angels every game.  In that case, I'd recommend you find something else (like honor guard w/ melta guns).

One other thing I should point out is that Predators make good walls for your Blood Angels to advance behind.  If you stay close enough behind them, the Jump Troops can generally ensure the charge.  Still, that's a somewhat expensive piece of mobile terrain.  Options are always good to have though.

Mech Gunline

AC/LC- Yes
Baal 'Standard'- Yes
Baal Flamestorm- Sometimes

This list would look something like this:  6x Predators, 4-6x Razorbacks, Librarian OR 3x Land Raiders, 3x Predators, 3x Assault Squads inside Raiders

So, lots of hard to deal with armor, and lots of shooting.  The troops won't be as good in combat (as in, not good at all) and the Baal 'Standard' will help out with taking out troops.  I said the Flamestorm sometimes, because of alpha strike capabilities.  I'll talk about that a little bit at the end.

Mixed Randomness

Well, this list could be anything.  I've been more and more under the impression that Blood Angels need to pick one thing and do it well- either pure mech or pure foot.  Mixing the two isn't to be advised.  In that case, whereas the preds might help this type of list, I would advise against it in a competitive setting.

Some Tricks to make your Preds better:

  • Remember your scout moves.  They can be a lifesaver.  Remember them, even if it's to move them 1" and pop smoke, since you're allowed to do that.
  • Building on the first tip, pop smoke at the start of the game, and use them as mobile cover for the rest of your force.  You can start with a solid 4+ cover on everything in your army if you do it right.
  • Remember outflanking with Baal Predators.  They aren't super likely to pop a tank on side armor (no matter what the internets tells you, it's less than 40% to wreck a chimera), but they can still cause mayhem.  Throwing a wrench in your opponent's battle plan is usually worth it.
  • Remember to set up so that you can alpha strike with your flamestorm against footslogging armies.  You'll need it against wolves especially.
  • Tank shock and 18" ram can be amazing.  I rarely see people tank shocking their enemies, and it surprises me.  AV13 + 5 (for moving 15"+) + 1 (for tank) is a S9 hit, that ignores smoke and hits in the movement phase.  Plus, leadership on combat squads is only 8- may as well try.
  • Armies that have lots of footsloggers (like orks w/ kan wall) can be stalled for a turn by boosting your preds at them and turning them sideways.  The goal isn't to keep the preds alive, but rather to keep them from advancing on you for a turn, while you deal with the rest of their army.
Flamestorm Alpha Strike

Well, I'm sure I overplayed how cool this is.  It's going to be anticlimatic now.  Here's the gist of it though:  Turn 1, you move 18" with your flamestorm if you get first turn, and turn 2, you move 12" and flamer a squad out in the open.  Lots of times this will be Devastators/Longfangs, but sometimes it'll be extremely awesomesauce against Loganwing or to a lesser extent against jump pack Blood Angels.  It's worth remembering though- if you run a pred-heavy army, you're going to hate those missile launchers.

Another option is to drive in and position your flamestorm next to an enemy transport.  If you can pop it that turn, you can fry the inhabitants.  Muhahaha

What do you think?  How do you run your Preds?

And here's a question:  how do you pronounce 'Baal'?

Option 1:  BALL
Option 2:  BALE

Let me know.  I always pronounced as Option 2, but the guys at my LGS pronounce it Option 1.  That's why you have all the ball pictures this time.  Baal spam, lolz.  Like my Razorspam wasn't enough. 

Anyways, catch ya later!

As a sidenote, I just quit my job because of a scholarship I just got and... hopefully I'll be posting more now that there's more time, both here, and on my 'main' blog.  If you haven't checked it out, feel free :)  Peace!

Brent's Strictly Average Painting Guide: Amon Ad-Raza

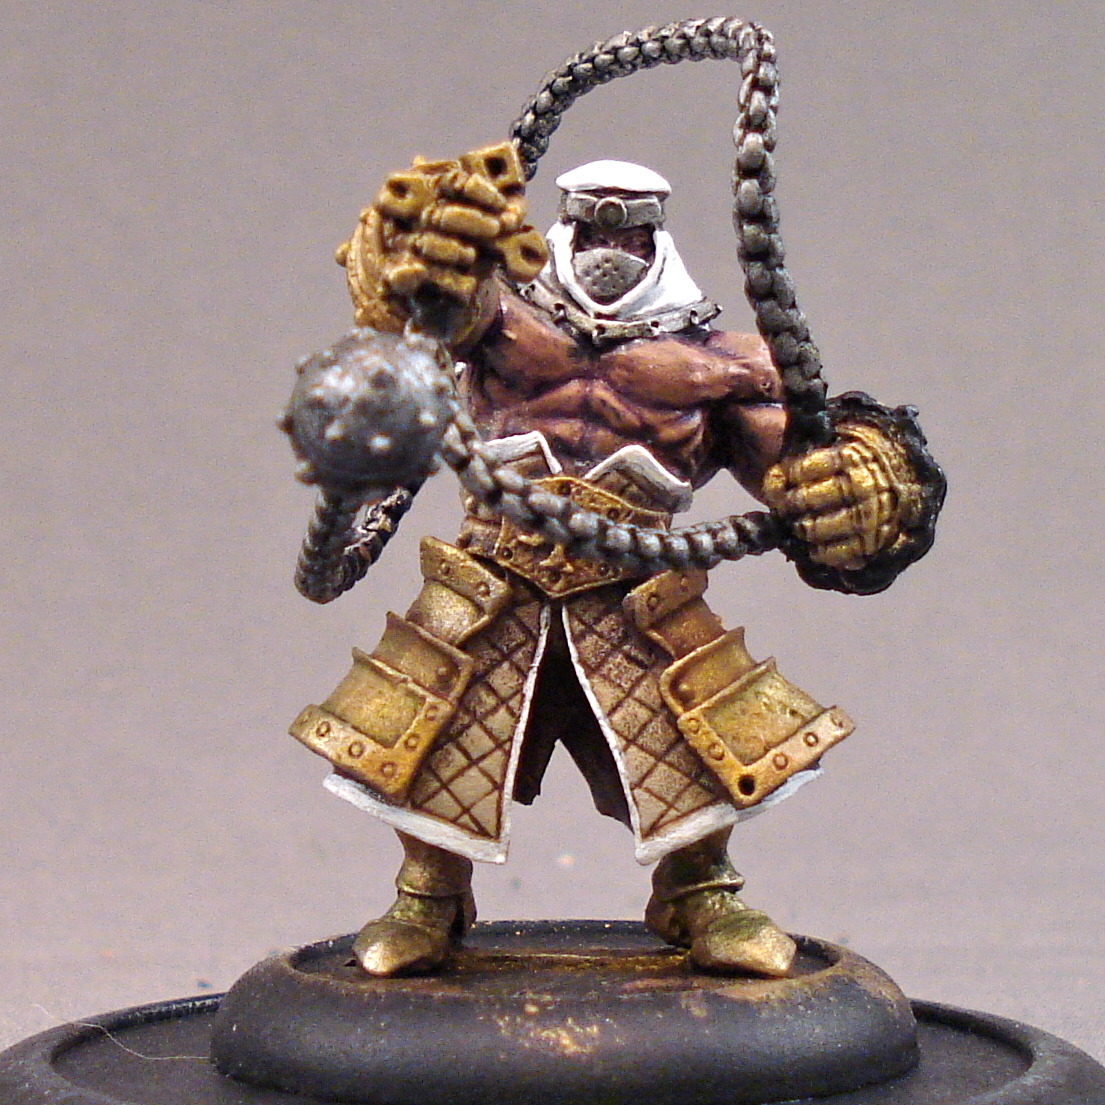
Okay folks, this is it!  The first ever Brent's Strictly Average Painting Guide, featuring Menoth's best 'Jack Caster, Amon Ad-Raza!

Let's spend a moment clarifying the basic premise: I'm not an expert painter, I'm a speed-painting competitive hobbyist.  I love every aspect of this hobby, from the fluffy background of the Warhammer Universes to the slightly-smelly halls of a competitive tournament to the small room in my home where I spend countless pleasurable hours painting tiny toys.

As a blogger, no topic even remotely related to the hobby we all share has escaped my attention, but there are two topics I tend to shy away from.  The first is trying to illustrate my method of painting and the second is trying to teach my brand of aggressive tactics.

While it may not sound like there's much left, that's only because those two things make up the vast majority of topics the average hobby blogger posts about.  Am I wrong?  Isn't it always paint this way or play this way?

There's nothing wrong with that, but I long felt the best way to ply my trade was to write articles which demonstrated my passion for the game, the hobby, and the community... after all, I'm neither the best painter nor the best player out there.  If I've had any success, it's because my love of the whole shebang has shone through.  That's what I think, anyway.  Still I've always thought about tapping into my ideas on painting and playing...

...and this series on The Blood Angels: by Jawaballs is a big part of that: step 1 of 2, you might say.

Anyway, over-long intro notwithstanding, my primary goal is to write an entertaining article.  If you read something that helps, great!  If you want to help me, that's great too - I'm always willing to learn.

The general idea here is to layer up thin coats quickly.  Inside-out is usually the best way, especially here  since it's skin.  This isn't really the first layer as much as it is the foundation for the colors that come later.

The skin layer gets a wash of purple, the rest of the model gets its foundation layer.  I love painting over brown, since the warm colors all live there.

I build up the brown tones - FAST.  Seriously, this is all about getting a decent quality quickly.  I'm literally using a crappy, canvas painter's brush - the ones you get in varying sizes like 10 for 5 bucks.  Don't glop it on though; over-brush it.  In my mind, over-brushing is like a wet dry brush.  It won't always leave a great texture, so it's not appropriate for flat armor like that of a Space Marine, but it's great for cloth and fur - again, like dry brushing.  Then I layered on thin gold... and here's where the foundation helps.  The browns will show up, giving the gold a decent richness...

...but but but..!  It won't look appealing at all.  Don't be discouraged; again, you're building up layers which you'll bring out later with washes and/or controlled layering.  Notice here I'm not painting the chain on the left arm - it can't really be done properly, which means I'd have to clean it up later, which means I'm wasting time.  As I'm painting, I'm enjoying the process... but it doesn't mean I'm not ready to paint the next dude.

This is the same stage (the base metal) but taken from the rear point of view.  Again, I'm trying to be neat so I don't waste time fixing things later, but the problems are glaring.  Resist the urge to fix.  Trust the process.

The washes are probably the best thing GW has ever come up with and they've replaced most of the custom washes I used to use.  As an aside, I think Devlan Mud is overused - don't neglect the others.  I used Sepia on the cloth and gold, green on the gold, and black on the metal and some shadows.  Let it dry completely.  

I never paint one model at a time.  If I'm painting a one-off, like a character, I'll have another project running concurrently.  The reason is obvious - I'm not wasting time twiddling my thumbs while paint is drying.  Avoid downtime.  If you've got only half an hour to paint, make sure your brush is moving for 30 minutes.  You'll make progress.

Here you can see the washes are dry and the model is starting to take shape.  The white is layered carefully.  Now I'm using the good brushes.

It's hard to see, but I'm also applying the base coat for the cloth Amon wears underneath his forearm armor.  I'm using the Foundation Ochre, I believe - whatever the yellow one is!

Here's the skin stage.  I'm carefully layering on different stages.  It becomes obvious when you compare this stage to those at the end.  If you've done your foundation work properly, you won't be applying color on the edges - anywhere color-meets-color should be done; I'm layering mid and high tones.

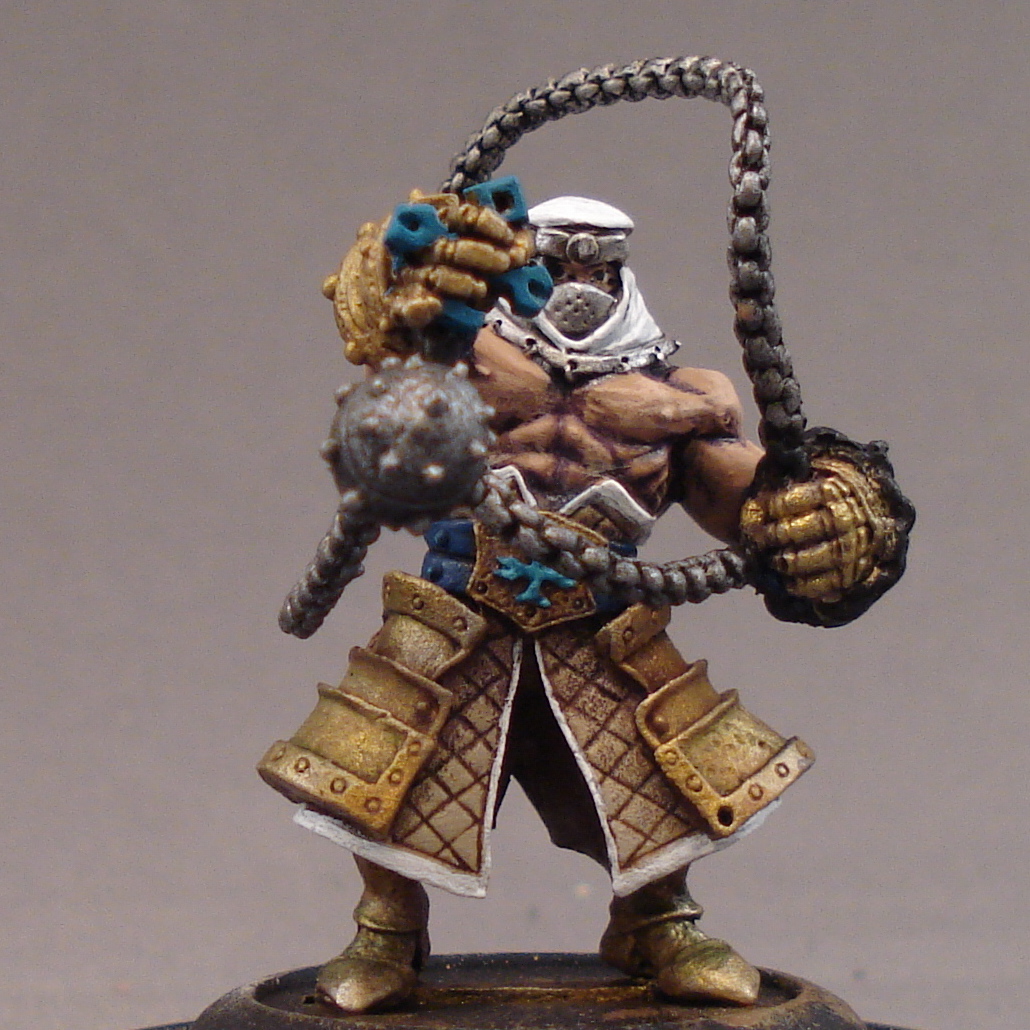
The interior wrist straps are blue - it's hard to see until the final picture or two.  Anyway, the skin on the back is easier to see.  Use water in your paint and layer it on in thin coats.  Don't over paint it or over think it - the process is the thing, right?

In my army the contrasting color is the turquoise.  I've had some criticism about it, but I really like it... and you're the one who has to live with the model, right?  Anyway I only mention it because I had a composition problem at this stage.

Part of painting is solving a puzzle; at its core, the puzzle is what color fits where?  Look at the model above; I knew I was using white and red.  So where?  Well, white draws the eye in, so it made sense for the head scarf... especially since the eye has to look past the huge wrecking ball before it can see the core of the model.  Since the head scarf is white, I decide I don't want to overuse it on the model, so I'll settle for constraining the model with white on the trim.

That said, red would have made sense on the trim, too.  Triangles are another shape that draws the eye inward, and for some reason red works great with triangles... it's why the 3-spot technique works so well.  Anyway, the trim points up, yes?  It would have worked.  Funny, I worked all this out before actually seeing the company's version of the model.  I was pretty gratified when I did!

Don't worry, no model looks that great magnified this much, certainly not mine!  Still, it's important to see the layering; you're not meant to see the model this way, so don't obsess over it too much.  I'll admit, the eyes bothered me no end, but I realized two things, 1) the eyes are actually hard to see on this model because of the cowl, and 2) I probably would only screw it up further since the shape of the headdress made it so difficult to paint.  I left it alone.

The red goes on in thin layers.  The foundation shows through, providing instant depth - and it was light enough a color that the red is vibrant, not muted.  I applied a few washes of a deep red in the creases...

...both front and back.  Here you can see the final layers of skin, as well as my answer to another composition problem I didn't go into.  Note the greens in the gold work with the reds on the kilt - ignore the Christmas curse, it's a myth: green and red are fine together most of the time.

I paint the gem and the crosses.  I highlight the metals.  I layer the metal chain and fix the chain on the left arm.  A big problem at this stage was fixing the individual fingers on both gauntlets - for some reason, they'd ended up appearing washed out and flat, so I quickly toned it down then built it up.  I flocked the base.

And here it is.  There are some minor imperfections, but truth be told they're only really noticeable in picture.  Also, keep in mind the point here is to get an effect you're happy with without spending a stupid amount of time at the painting table - if you fix every nit picky error you'll never be done... primarily because there will always be something else you're unhappy with.  That's the definition of obsession.
So there you have it, my Amon Ad-Raza.  I actually don't know how much time I spent on this model because, like I mentioned, I don't work on one thing at at time.  It was somewhere between 2 and 3 hours - and probably much closer to 2.  He is a character model, so he was worth investing a bit more.

What's more important is that I enjoyed spending the time doing it.

Okay, I'll admit something here, at the end... I'm not sure what to do with the morningstar... giant ball... thing.  Right now its metal.  It's dull and uninspiring.  It's a composition problem that I've not quite sorted out - primarily because I was saving it for this article!

(That's a lie.  I have no idea.)

Help me out!

Your thoughts and comments are much appreciated, ladies, gentleman, and Unicorns.

Feast of blades banner update


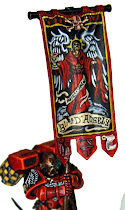
Finally I got some time to work on the Feast of Blades banner!  The wings are mostly done as are the scrolls. I started going in and adding black outlines to make elements stand out in space, such as the lines around the scrolling. This is a painting trick to make certain spots appear closer in space. Notice how I emphasized the black line on the end of the up flowing tassel on the right, to the right of the sword. I really made a hard edge black on the end of the tassle, but the rest of it sort of gets thinner. That enhances the effect of the tassle flowing in front of the wings. 

I played a bit with the bone fingers to make them look like they are popping out, and the red on the flowing sleeve around the bone hand.  That will end up being brighter and lighter than the rest of the robes since it is closer to you in space.  The shield represents a different challenge in that it is a domed shape, that is closer to you in the center but receedes at the edges.  Plus it is done with two different colors.  I have still left the colors of the shield intentionally muted because what is more important will be the things I paint on it's surface. With so much going on in this design, I am trying to minimize the effect of elements in the painting competing with each other.  With some luck, I will be done this week. Then I can start on my next one, the Space Wolves Chapter banner!  I can't wait. :)  

Jawaballs

There's a storm on the horizon!

Behold!

Bullet Holes, and Hand Painted Raven! (I got inspired)

Close up of raven

Yes some of the Dragon Red prime is thick, it was late 
and I was getting stoned from the fumes. :)


Weathering straight from this months issue of White Dwarf
featuring ME of all people! :)


It's here!  I wrote a Blood Angels Storm Raven into the list I plan on playing in the Templecon singles tournament tomorrow. This was entirely contingent upon me getting one of these babies in my hands! But unfortunately the model was not to be sold until the day of the tournament, and there was no way I could get one assembled, painted and ready to go.  But of course, JawaNation came through! My first Storm Raven arrived last night, probably right around when GW preorder models were showing up on people's door steps.  That gave me the evening to assemble and prime it. I used Army Painter black primer, and then Dragon Red for the base color. It already looked amazing!  The picture shows the results after priming.  Primed and assembled the engines separately so as not to have to hand paint the metalic.  I used Army Painter Platemail.  In this pic I quickly did the pilot and gunner and the compartments and just glued on the canopies.  Also you can see the magnets attached to the turret, I magnetized the options.  

So there it is so far. Now I am working on highlighting and blending, and I am doing lots of battle damage on this one.  This being my first, I don't really care how it comes out so this gives me the freedom to experiment. 

Will Storm Ravens make it into competitive lists?  Well I am trying. I won't let the cat out of the bag yet on my new list, but it is a drastic divergence from what I won Mechanicon with.  After the tournament I will post up the list and results/tactics.  Look for that next week!  Time to get back to work.

I am doing bullet holes in the side where I put a big fat finger print in the primer because I was rushing.  wish me luck!

If you are looking to get Storm Ravens at 20% off GW Retail, OR if you want Storm Raven Bits, visit Spikey Bits!  Clicking the link will take you straight to the site where you can find Storm Raven Bits, or call Rob and tell him to send you the box sets!  Make sure you tell him I sent you.

Jawaballs

Blog Changes!


I'm sure you guys have noticed new faces around the blog.  As most of you know, I decided to bring in some other writers to join me here.  What does that mean?  First of all, I am not posting any less than I already did.  I was averaging 2 or 3 posts a week, and still get that many up now.  I am still doing the same Blood Angels and hobby tips, tactics and fun stuff, mixed in with occasional gripes, movie reviews, and other oddities. What I have added though is more stuff that supports what I already do.  I added two weekly writers, one of them being Xaereth who's impact is obvious. His redefining Blood Angels articles have been hugely popular.  I brought in every one's favorite blogger whore Brent for his different take on life.  In my opinion any thing he writes is just gold.  I have brought in one or two guys to focus on battle reports and list building to give you guys more of what you want the most.  So be looking for some good weekly articles, with other great occasional content filled in, all wrapped around what brought you here in the first place, Jawaballs... stuff.  Giving you more of what you want! Good gaming content.

Jawaballs

Space Hulk Terminator Commission DONE!


Finally!  I finished my first Blood Angels, Space Hulk Terminator commission. Well I never claimed to be fast. I want to thank John for his patience on this commission.  Each of these models took me well over 6 hours to paint.  The crappy photography does not do much for the layering and detailing, but it's there!  I started with Army Painter Black Primer, then used Army Painter Dragon Red.  Then I layered up from DR to Blood Red at the edges. Then I used blazing orange highlights, then a light wash with Baal red, then a 50/50 blazing orange and vomit brown.   I filled in the lines with a mix of Black and Blood Red, and some of the details black.  Then I used the standard parchment, bone, wing techniques.  

Before I send them out, I will give each a finish with Valejo Satin Varnish. This will add a final sheen to the armor. I wanted to photograph them before because my lighting sucks and I use flash, and flash with the Valejo Sheen makes them look glossy.  

No, I didn't follow the Space Hulk illustrations and give them the squad markings etc.  And yes, I have seen Space Hulk models painted better.  I admit I am not the best. But I must say that I am not bad! What these models represent is my love for painting and the passion I put into my work.  I charge a lot, but I believe that what I give my customers is more than worth the price.  

Feel free to blast away! But please keep it constructive, and if you have a criticism, offer a way to improve it! :)  But at this point these models are finished and in the mail.  Hope you like them John!  

Jawaballs


Blood Angels in Action: IG Incoming!

Photobucket


It's time of course for another battle report, brought to you by none other than the Capt of the 8th. I'm sure you all missed me terribly (or not at all) since my last post, but I'm back today with a doozy of a write up.

I got in a fantastic game this past week against IG. It had been awhile since I had been able to play a game, but I found a friendly dude on a local gaming forum to go up against. We met up at the designated time and got straight down to business. I have to say I lucked out this time. The guy was a great gamer. He knew the rules and he was way cool the whole game. He played for the kill and this was one of my favortite games to date.

We rolled up standard deployment and capture and control for mission. Neither of us wanted to do the 2 objective thing, so we just went for annihilation. Points was 1750.

I brought my Descent of Angels list, true to my promise to stick with it and work out the kinks. I modified it from last game to add in some more combat punch. I wanted a hard hitting unit to get into assault fast. Enter Vanguard Vets!

Librarian - JP, Lance and Shield
Honor Guard - JP, 4x melta

Techmarine - JP, combi-melta, PW
Sanguinary Priestx3 - 2x JP and Infernus pistols, 1x on foot

Assault Squad - JP, 2x melta, PW and IP on sergeant

Vangaurd Veterans - 6x models, JP, Glaive on sergeant, Pfist, 3x storm shields

Devastators x2 - 4x missile launchers

My opponent brought:

Company Command Squad with full command and sniper rifles

4x Vet squads - 10x models, 2x plasma and meltagun
4x Chimera

2x Vendettas

Leman Russ
Leman Russ Demolisher

3x Stormtroopers - 5x models, 2x melta

I won the die roll to go first, and chose to do so. I wanted my Devastators to have a shot at knocking out some tanks/skimmers before they got blasted off the table. I loaded them up in a ruin in my right corner to benefit from the Techmarine enhanced cover save.

Here are my Devs hunkered down in a nice ruin.
Photobucket
And as a side note, I am a terrible photographer for some reason. I can perform minor surgery on and around the eye, but I just can't take an in focus picture.
Go figure. So just don't look too close at the images, you might get seasick or dizzy.

He then deployed right across the board from me, ready to get into my face. He uses the chaos shrine to get cover for most of his tanks, and the AV 14 LRs covering the rest.

Photobucket

He also scouts his Vendettas to generate a cover save for round one. Wonderful I think, I have no good shots to take. Everything has cover or is a wasted shot into AV14.


So I do the best thing I can and fire all my missiles into his Vendettas. Nothing at all. He saves every glance or penetrating hit. This doesn't look to good. On his turn he repositions some of his Chimeras. Lucky for me 2 of them get immobilized on the terrain. Serves him right for hiding behind Chaos. But then he starts blasting me with that famous IG firepower. He wipes the lower squad off the face of the earth and the attached priest. He also knocks one of the ML devs from the top tier. It could have been worse I suppose, but he is already 2 KPs up on me after my bad round of shooting. I debated back and forth whether to send my troops to ground for the 2+, but I just couldn't do it. Seemed like I would never recover the loss of the Devs shooting. Oh well, next time I think I will be more apt to do it, and try to save the shooting for future turns.

Photobucket
(after he blasted my Devs to bits)

Turn 2 things should get better I felt. Until he tells me he has a Master of the Fleet. Uggh, +1 to my reserve rolls is bad news. After all my rolling, all I manage is my VV and a Techmarine. Good or bad, I don't know yet. It is pretty piecemeal. I land my VV next to his two Vendettas hoping to down them with my Pfist on the assault. I had no better options really. My Techmarine (all pewter model to the left with no arms, I call him David) landed spot on behind his LR Demolisher, and it was my turn to shoot.

Photobucket
(here is the first drop)


My devs target the Vendetta with 3 missiles and they manage to down one of the buggers! First blood for the Angels! The Techmarine then blows up the LR with his combi-melta. Alright, we are back on track now and tied 2-2 on KPs. The VV only manage to take a gun off and immobilize the vendetta. Not what I was expecting. I needed that last Vendetta dead, and my powerfist underperformed.

On his turn, he started blasting me again after his 3 squads of Stormtroopers dropped in to surround my VV. I really couldn't stand up to the onslaught. A multi-laser downed the Techmarine (so much for that 2+), and all the melta and hell-guns from the stormtroopers downed my Vets. The Vendettas with the remaining LR killed the rest of my Devs. He is up 3 more KP now, and I am down morally. I just am not standing up to all the firepower he can bring and things are not looking good for the Angels.

Turn 3 all the rest of my stuff drops in. I land my Techmarine by his remaining LR. One squad of melta toting marines and an attached priest land right near his Stormtrooper squads.

Photobucket
(second drop)

The Honor Guard with attached Librarian land near his outermost Chimera on the left flank, and two assault squads land behind them and within range of the Shield of Sanguinius.

Photobucket
(Libby with HG and vanilla assault marine combat squads)

The last melta toting squad landed in the back right corner, right behind all his tanks. They scatter a bit out of position which makes things a bit more difficult for me. Time to shoot some crap up now. My techmarine goes first and misses with his combi-melta. That sucked. Although the two of them together killed his one LR Demolisher, which was more points than they cost together. The melta squad in the middle of the Stormtroopers tries to vaporize a squad but fail to do so as he saved all the pistol shots. The other melta squad fails as well to do anything of value beside taking a multi-laser off an immobilized chimera. Now it is time for my Librarian to get in some action. He fired off his Blood Lance hitting both of the Chimeras in his path. The first one exploded spectacularly, but the next one was left unharmed, although it was already immobilized. I don't have any assaults to go with so it is time to take another beating from all his guns.

His 1.5 squads of stormtroopers near the Vendetta target my assault squad with the attached priest and start to do some damage. After some poor roles on his side he managed to kill only 3 of the marines. The other squad had moved up to corner my half-blind Techmarine, and they subsequently downed him with melta fire. In the corner the two Chimeras unload all they can into the combat squad with attached priest. Only the sergeant and the Priest survived. On the other side of the Chaos shrine one of his Vet squads had already ditched their immobilized Chimera, and the other Chimera had just disgorged its vet squad its burning hull. Combined with the reaming Leman Russ and the Command Squad they unleashed hell on my Librarian and his Honor Guard. Shield of Sanguinius went up and I started making saves like I had no business doing. Sanguinius himself must have been there deflecting round after round for his sons. After the AP3 pie plate from the tank, a pie plate from the Master of Ordinance, a few sniper rifles, 4 rapid firing plasma guns, a couple of melta shots and loads of lasguns, my Librarian ( with one wound remaining), his Sanguinary Novitiate, and another veteran stood up from the malestrom with blood in their eyes. The IG had not brought enough guns to the fight and it was time to pay.

Top of turn four my squad breaks up to get maximum carnage in near the Vendetta. The priest moves towards the shrine to get one Stormtrooper squad, while the remaining marines move the opposite direction for the other squad. The combat squad in the back corner did not have any good targets so they went after an immobilized Chimera with their melta pistols. The Librarian and company moved up on the poor Guardsman who had exited their transports; the Angels would exact their revenge. Little shooting went on, except for the Chimera getting wrecked from the infernus pistols. It was time for the assault. One combat squad assaulted the closest IG squad and moved it out of the way with the pile in move so my Librarian and HG could get at the second squad behind them. It worked like a charm as the second combat squad piled into the melee to support the other assault marines. The priest charged a Stormtrooper squad solo, and the other marines charge the remains of the second STs. The priest gets killed as he flails around helplessly amid the STs. The assault marines fare no better against the toughened armor of the Stormtroopers, and they in fact lose one of the marines while inflicting no casualties at all. What a bad start for my assaulting this round. Luckily, my Librarian pulls his weight admirably. He and the HG wipe their squad on combat resolution, while the other 10 marines do the same to the remaining squad.

Photobucket(after the rout, the Angels try to take some cover from the incoming STs, the CCS and the last LR)


Photobucket

The remaining assault marines after the ST squad that claimed the priest jumped into the fight. The last ST squad is behind the LR getting ready to come at the Librarian and friends.

Next round the LR takes aim on the Librarian and HG and manages to down the last two Vets, but the Libby still stands. The charging stormtroopers don't do anything with their weapons, and the CCS also fails to do any damage. The last Priest and sergeant in the corner behind the ruins also weather the fire to come out unscathed. The melee continues with the Stormtroopers near the Vendetta with neither side buckling.

Top of turn four, things begin to turn my way completely. My Librarian makes a suicide run for the incoming STs, while all my other available marines converge on the CCS in the Chaos Shrine. The Librarians righteous rage fills him as he unleashes the Blood Lance on the ST and the LR behind them. One of the ST is pierced through by the lance, which then penetrates the heavy armor of the tank and cooks off its ammunition store. Another ST is lost in the conflagration and the Librarian then charges into them headlong and slaughters them in combat.

Photobucket
(here is the Libby after blasting the tank and mangling the STs)

The CCS can not withstand the rage of the assault marines and the last Priest. They butcher them all to a man amid the Chaos suffused ruins.

Photobucket
(what remains of the CCS is too small to be seen here)

The drawn out combat near the immobilized Vendetta is slowly coming around in my favor as well. I have finally taken out one of the squads and begin to attrition the other.

At this point the game is about tied in KPs, 10-9 in my favor I believe. His remaining Guardsmen are completely unable to handle what I have left and I end up killing the remaining two squads of Vets and one of the Chimeras. At the end of the game he has only an immobilized Chimera and an immobilized Vendetta. I had lost my Librarian to a Perils of the Warp roll right in the middle of the Chaos Shrine, bitter irony, I know.

The final tally was 13-10 with a victory for the Blood Angels!

It was such a fun game and I learned some good lessons. Again, my opponent was top notch. He was way cool when he was beating my pants off the first few rounds, and he was just as cool when I pulled victory from the jaws of defeat. He was laid back and more than helpful in explaining all the new IG stuff to me. Kudos to him, hopefully I get the chance to play him again soon. He apparently runs a 7 Valk/Vendetta list that I would like to go up against sometime.

I finally used squads in support of each other this time and it really paid off. I normally feel like my marines are invincible (which they are not of course) and I hang them out to dry without the necessary support, especially on the DoA drops. This time I tried to keep things more centralized, except for a few instances, but it paid off. I applied massive force on one of his flanks and it crumbled. I was then able to sweep in for the win.

It was a hard fought game, and but for a few dice rolls it could have gone either way. It was a blast of a game though.

I need to get another game in soon, and maybe post up some of my Dark Eldar that I got for Christmas. I decided on a scheme and got some work done on them. Pics to follow.

Until next time!

Michael, Capt of the 8th

Brent's Strictly Average Painting Guide

My name is Brent and I'm a Blogger.  (Hi, Brent.)  I also have a problem.  (Do tell.)  I've been Stalking Jawaballs Since 2009.  (...what?)

Yes, I'm a confirmed Net Stalker.tm - so what am I doing here?